Provisioning
CoeFont Interpreter Enterprise supports automatic provisioning integrated with your organization's identity provider (IdP). With provisioning configured, user additions, removals, and attribute changes on the IdP side are automatically reflected in CoeFont Interpreter, significantly reducing the overhead of member management.
The configuration operations on this page can only be performed by users with Admin permissions.
To use provisioning, you must first complete SSO (Single Sign-On) configuration.
What You Can Do with Provisioning
| Feature | Description |
|---|---|
| Automatic user creation | When a new user is assigned to the CoeFont Interpreter app in your IdP, a member is automatically created |
| Automatic user deletion | When a user's assignment is removed in your IdP, the corresponding member in CoeFont Interpreter is automatically deleted |
| Attribute synchronization | Attribute changes such as name and email address are automatically reflected from the IdP |
| Department synchronization | The IdP department attribute can be automatically reflected into CoeFont Interpreter Departments (Department Sync with Your IdP) |
Supported IdPs
You can integrate with any IdP that supports SCIM 2.0. The following IdPs have been verified to work:
- Okta
- Microsoft Entra ID
Setup Instructions
- Okta
- Microsoft Entra ID
1-1. Switch provisioning to "Automatic" in CoeFont Interpreter
Open the authentication settings screen in CoeFont Interpreter and change SSO Provisioning from Manual to Automatic.
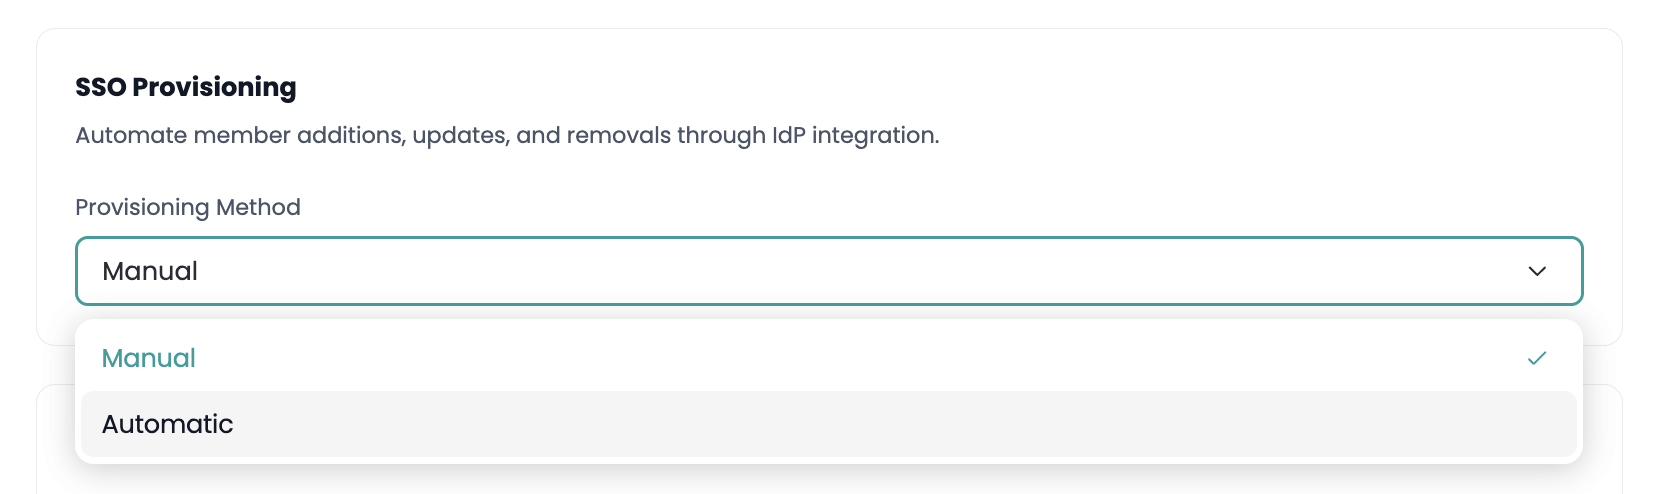
To set SSO Provisioning to Automatic, you must first set the Login Policy to SSO required.
1-2. Set provisioning method to SCIM in Okta
Open the target application in the Okta admin console, go to the General tab, and open App Settings. Select SCIM under Provisioning.
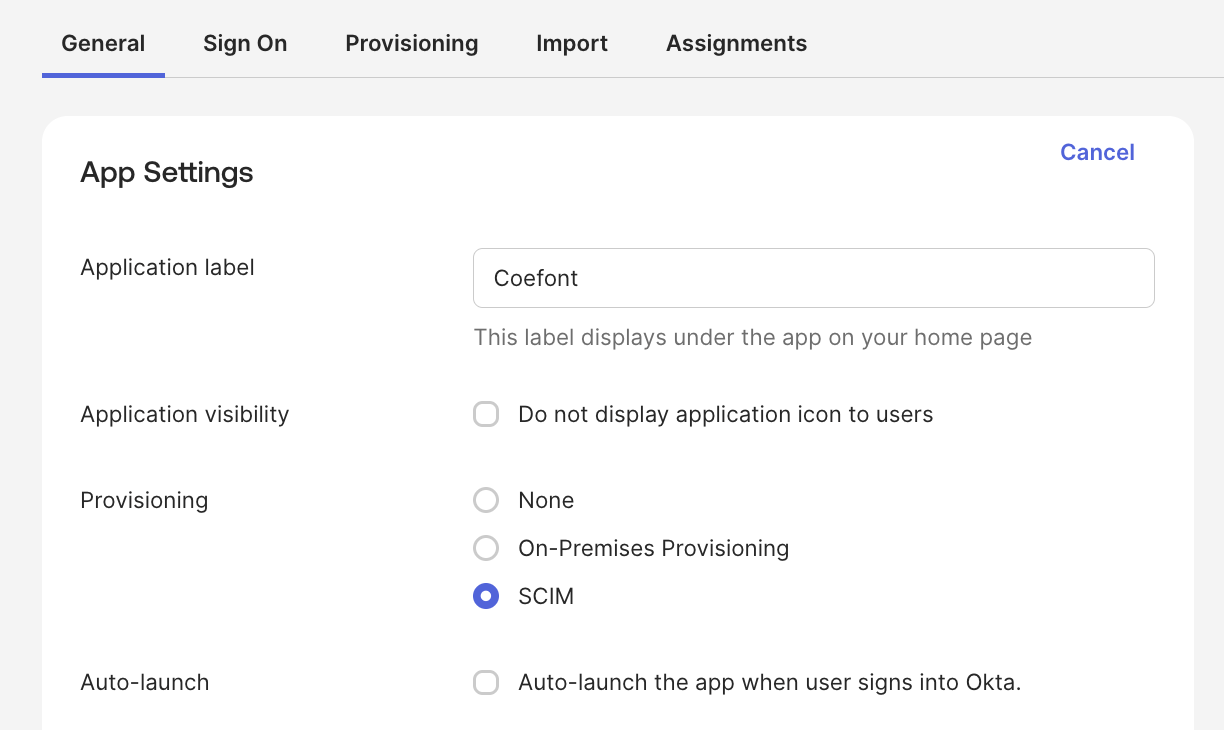
1-3. Configure SCIM settings in Okta
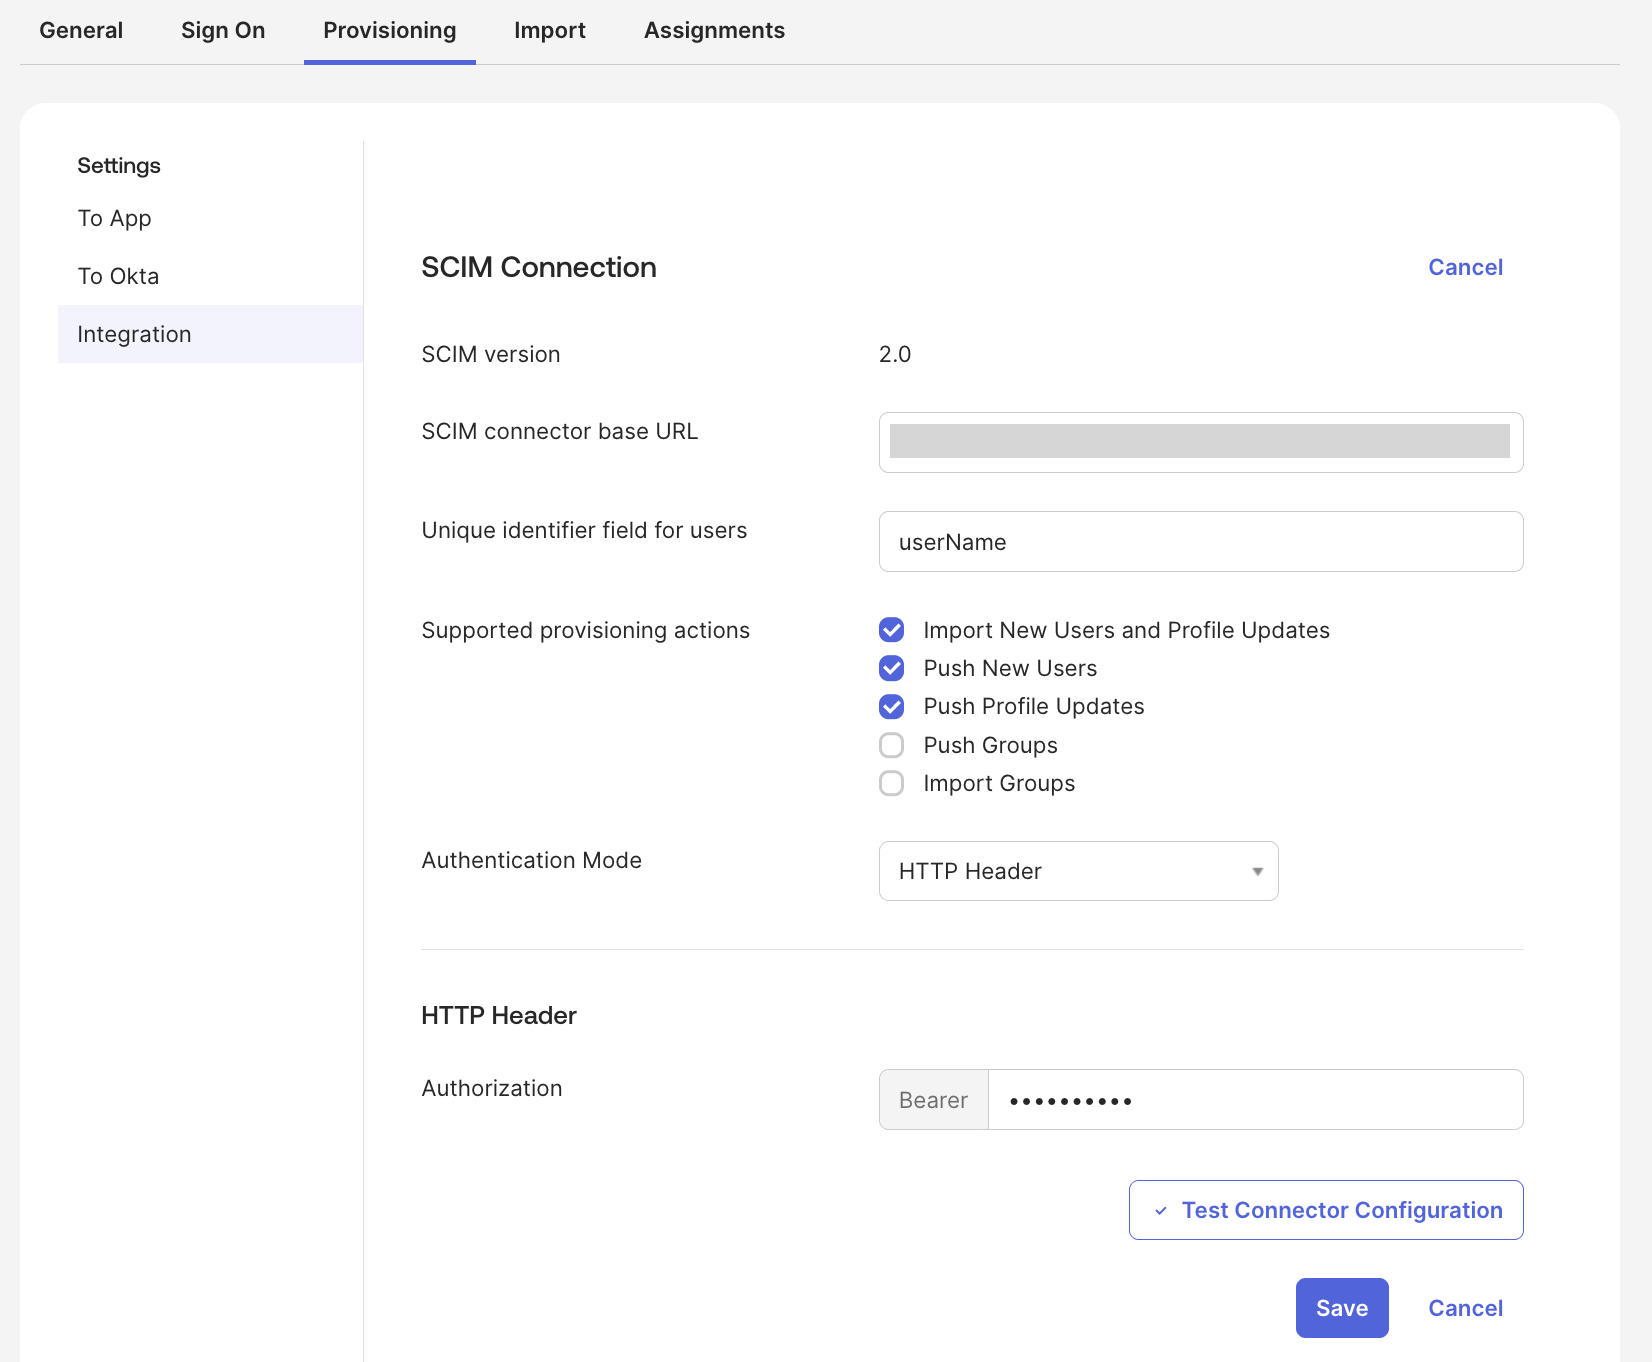
Enter the following in the Okta SCIM configuration screen:
- SCIM connector base URL: Enter the Endpoint URL displayed when you set provisioning to Manual in CoeFont Interpreter.
- Unique identifier field for users: Enter
userName. - Authentication mode: Select HTTP Header.
- Authorization: Enter the Bearer Token displayed when you set provisioning to Manual in CoeFont Interpreter.
1-4. Test the connector configuration
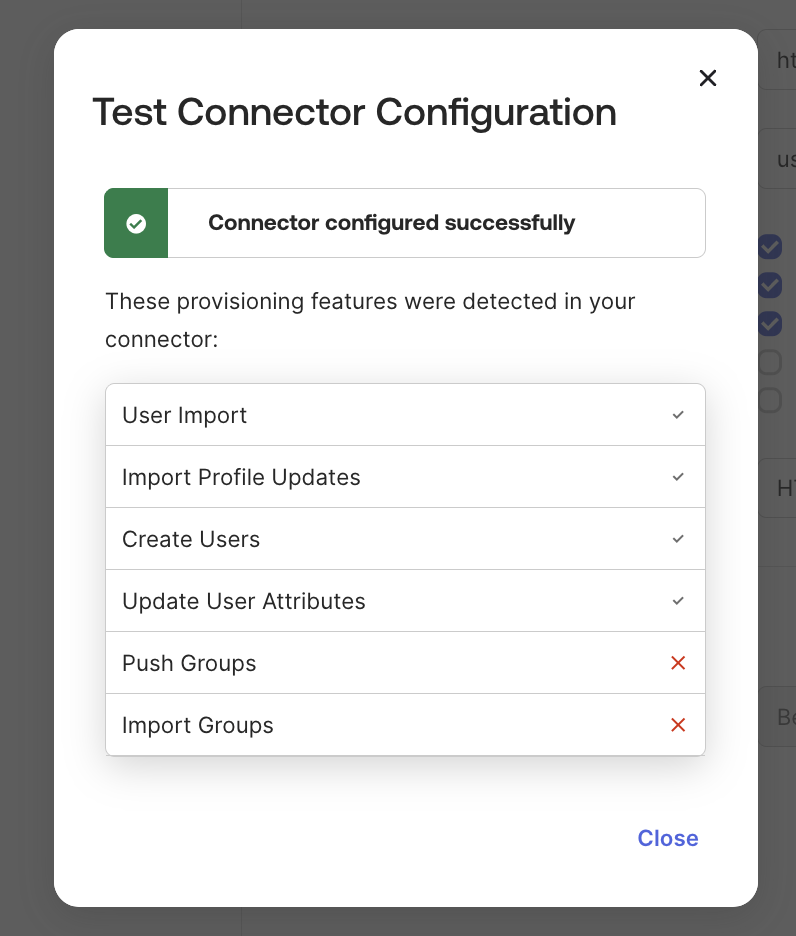
Click Test Connector Configuration. If the test passes successfully, the configuration is complete.
1-5. Enable provisioning actions
Go to To App under the Provisioning tab, check all three of the following, and click Save:
- Create Users
- Update User Attributes
- Deactivate Users
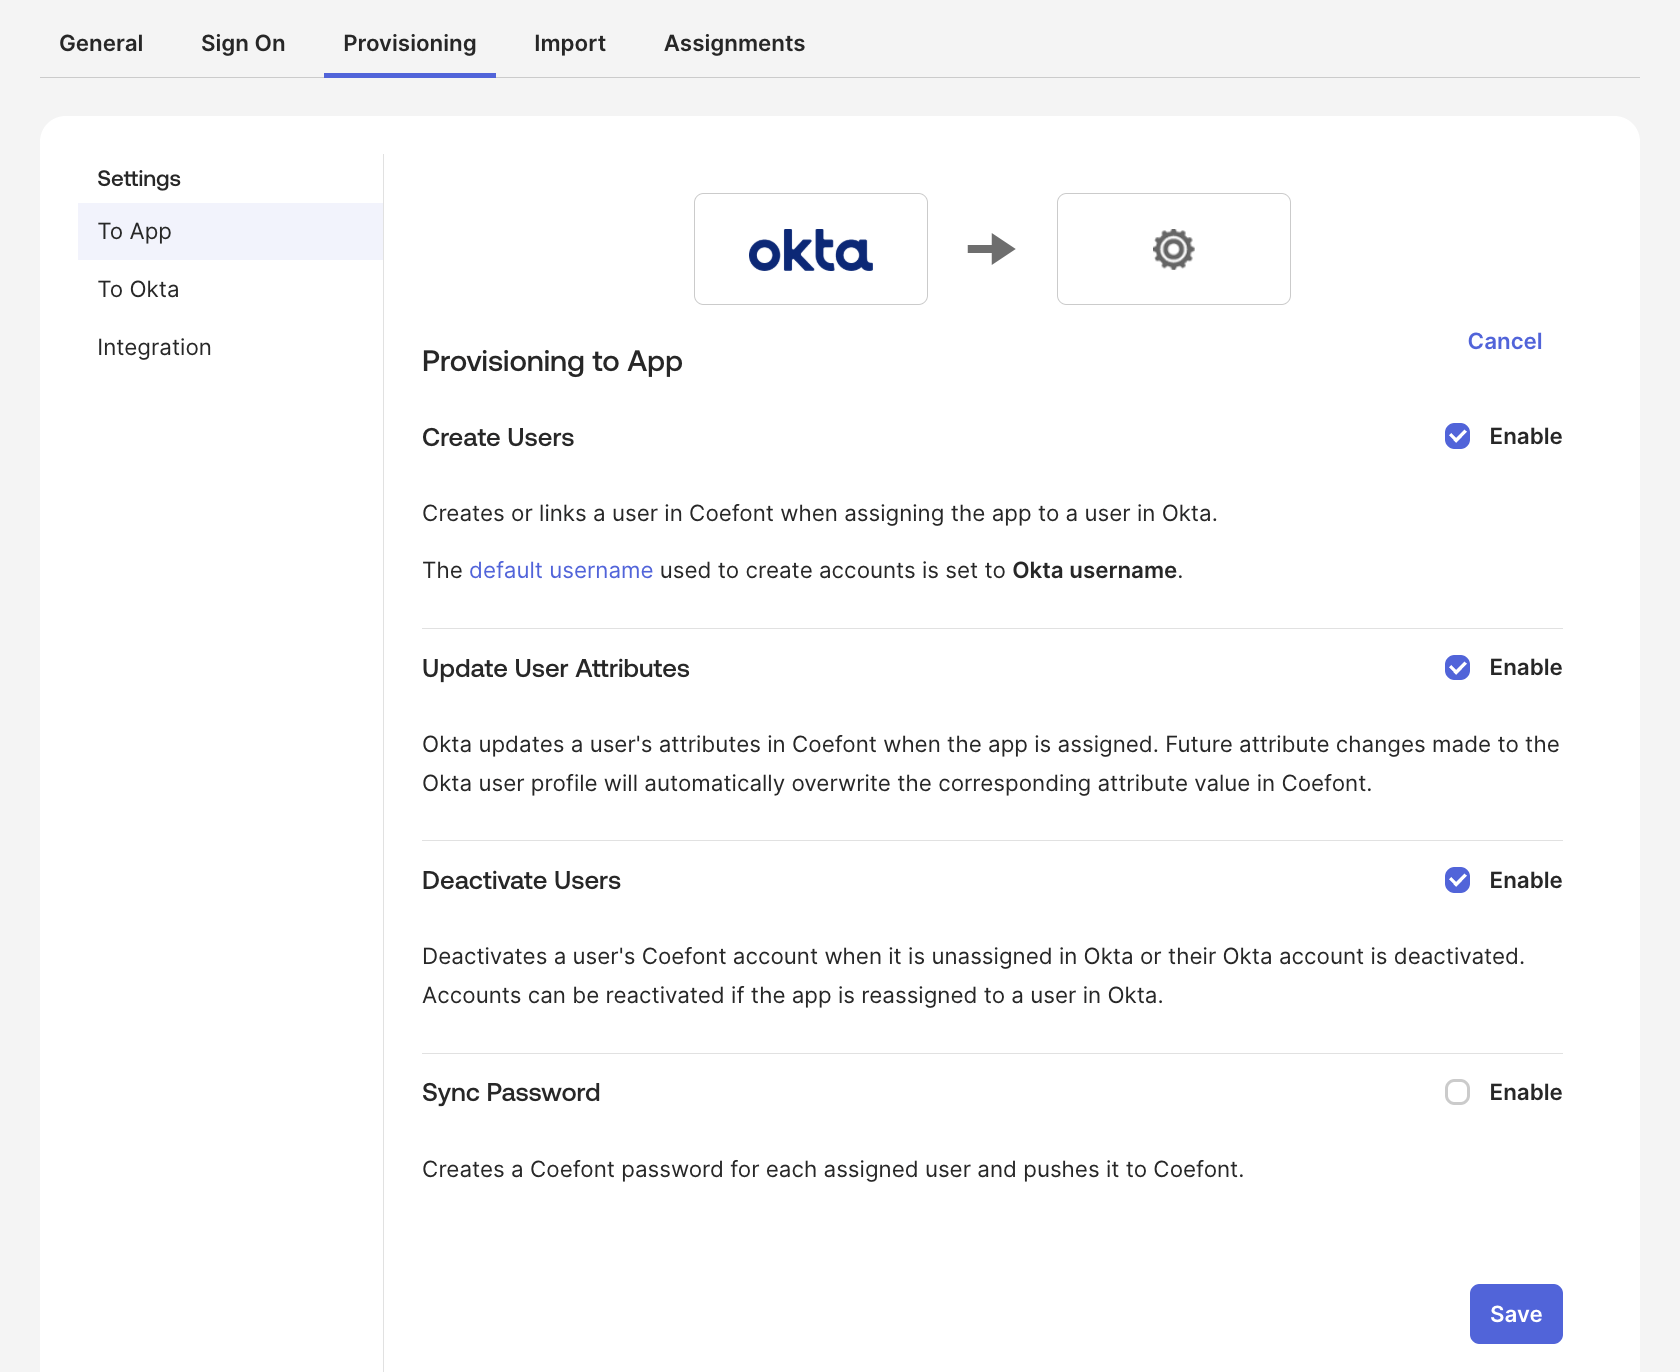
Provisioning setup is now complete.
1-6. Add users
From the Assignments tab, select Assign to People or Assign to Groups to add users.
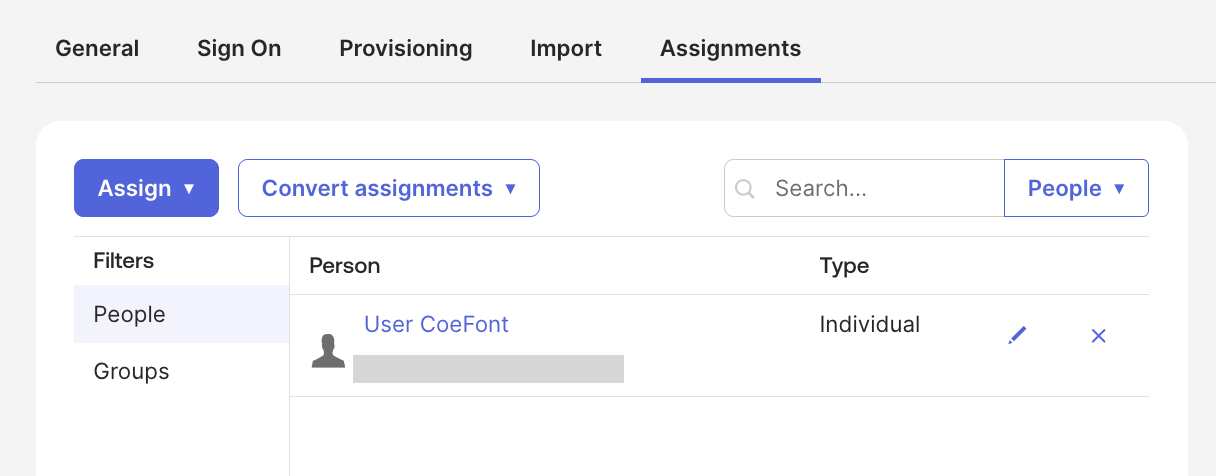
By setting a language code (ja / en / fr) in Preferred Language on the Okta side when assigning, the invited member is registered with the default display language corresponding to the Preferred Language value. For example, setting Preferred Language to en configures the default display language to English, and the invitation email is also sent in English.
The Department value is reflected into CoeFont Interpreter Departments only when Department Sync with Your IdP is enabled. While the sync is disabled, setting Department has no effect in CoeFont Interpreter.
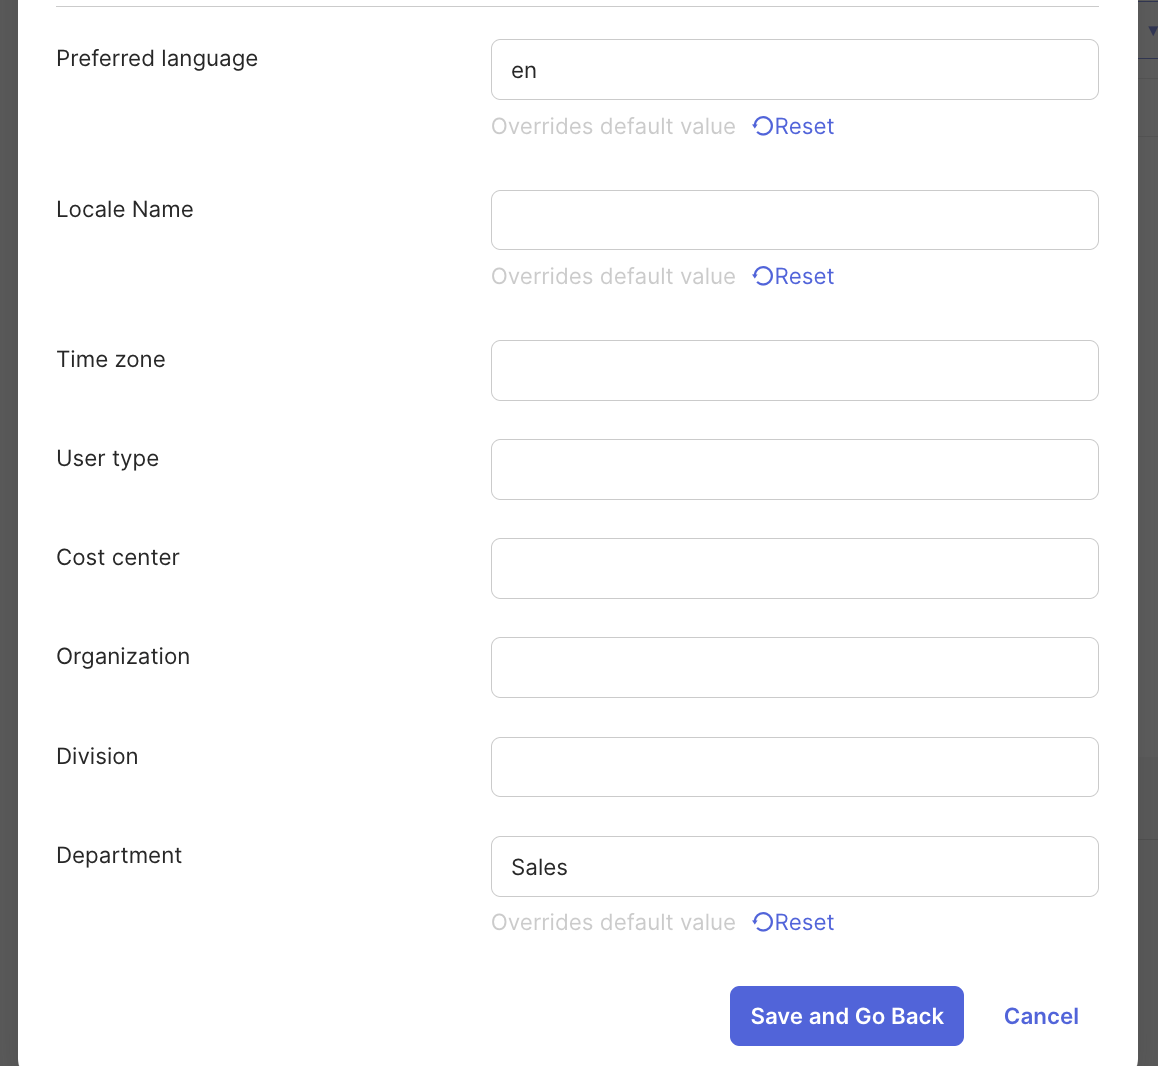
An invitation email is sent to the assigned user, and the member is also added in CoeFont Interpreter.

1-7. Remove users
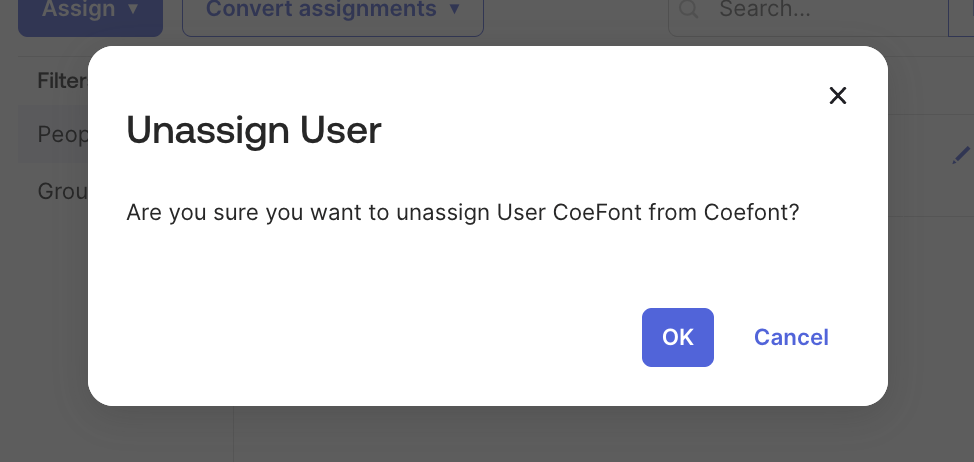
To remove a member from CoeFont Interpreter, remove their assignment in Okta. This will also delete the member from CoeFont Interpreter.
1-1. Switch provisioning to "Automatic" in CoeFont Interpreter
Open the authentication settings screen in CoeFont Interpreter and change SSO Provisioning from Manual to Automatic.
To set SSO Provisioning to Automatic, you must first set the Login Policy to SSO required.
1-2. Select a new configuration from Provisioning
Open the target application in Microsoft Entra ID and select New configuration from Provisioning.
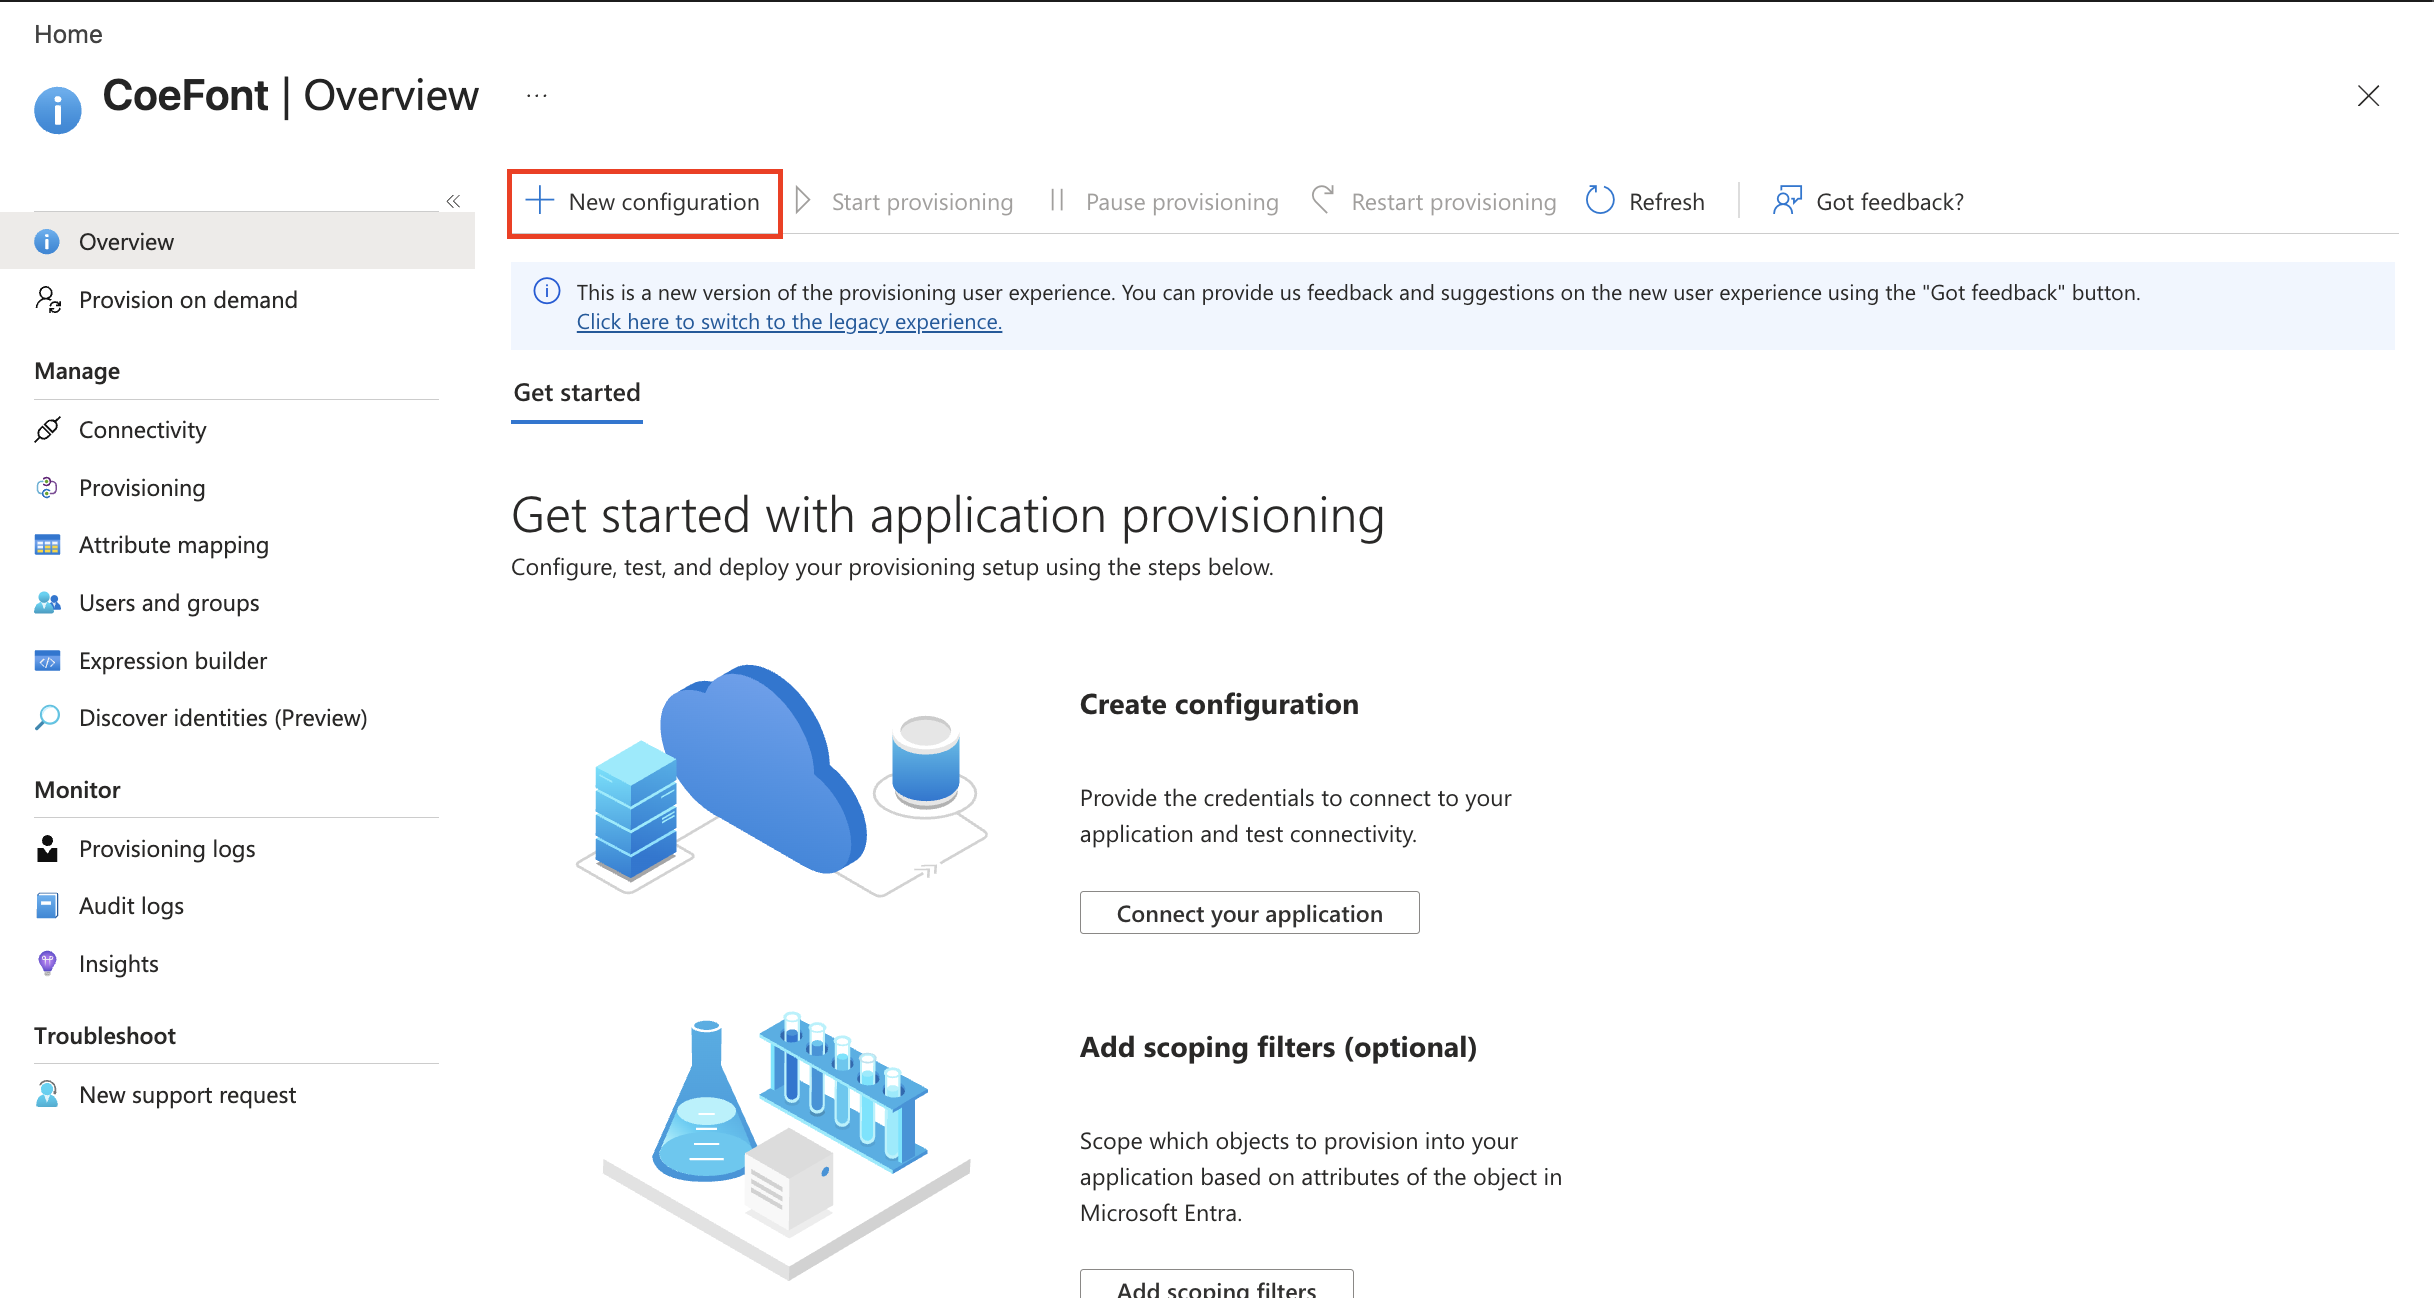
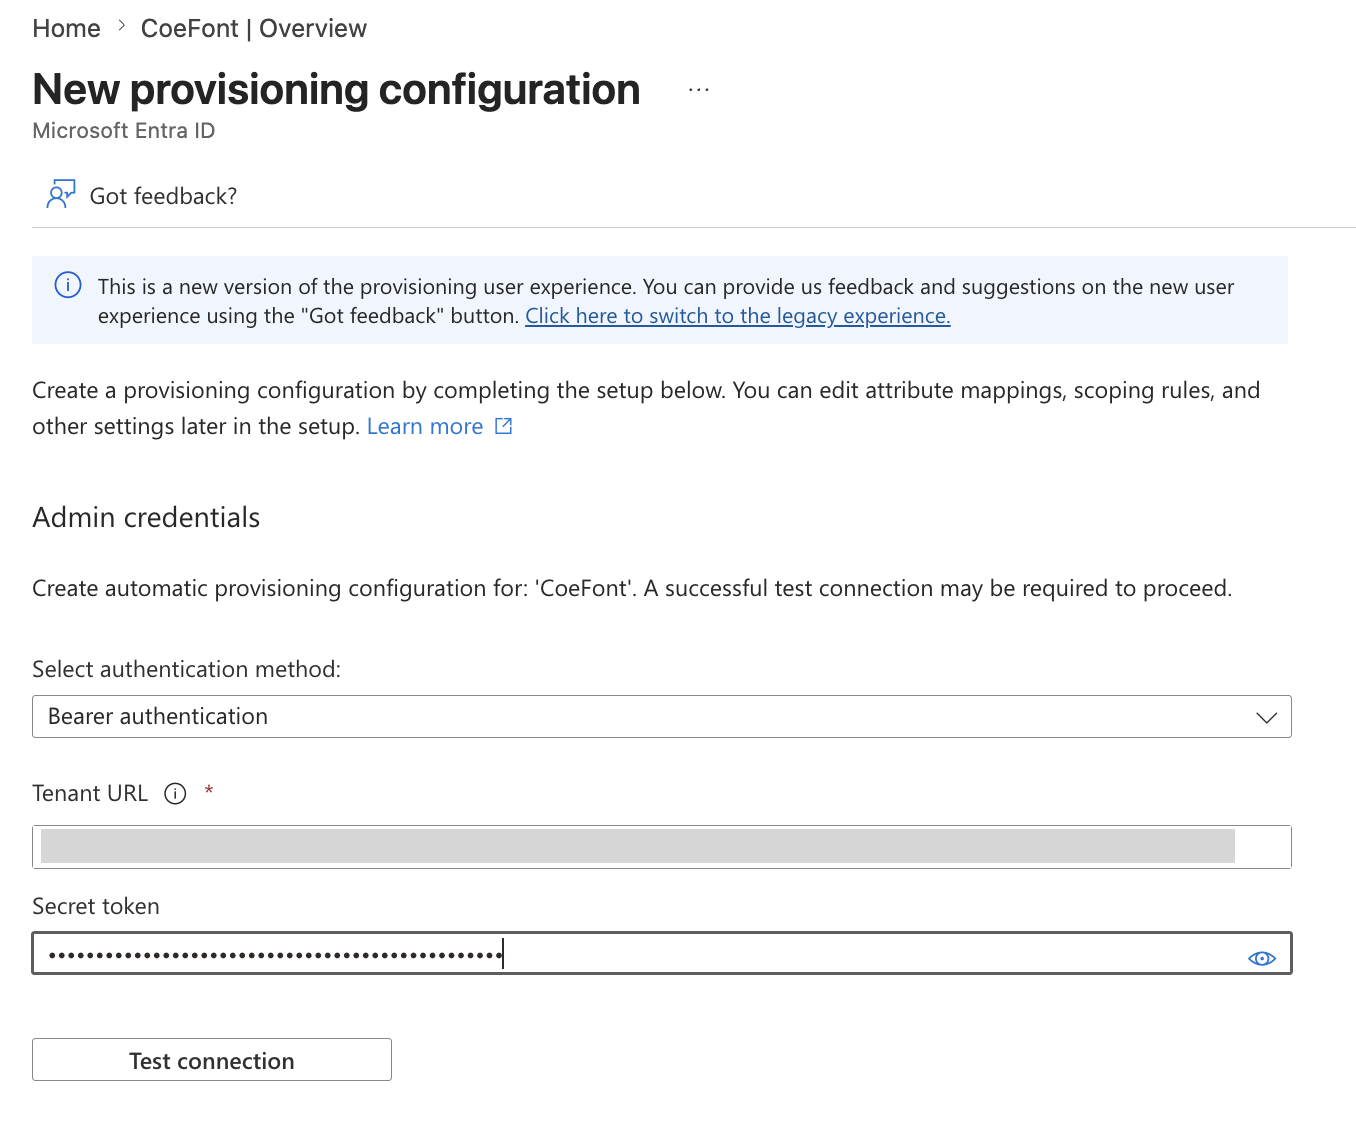
1-3. Configure credentials
Enter the following in the new configuration screen:
- Authentication method: Select Bearer authentication.
- Tenant URL: Enter the Endpoint URL displayed when you set provisioning to Manual in CoeFont Interpreter.
- Secret token: Enter the Bearer Token displayed when you set provisioning to Manual in CoeFont Interpreter.
1-4. Test the connection
Click Test Connection and confirm that the connection succeeds.
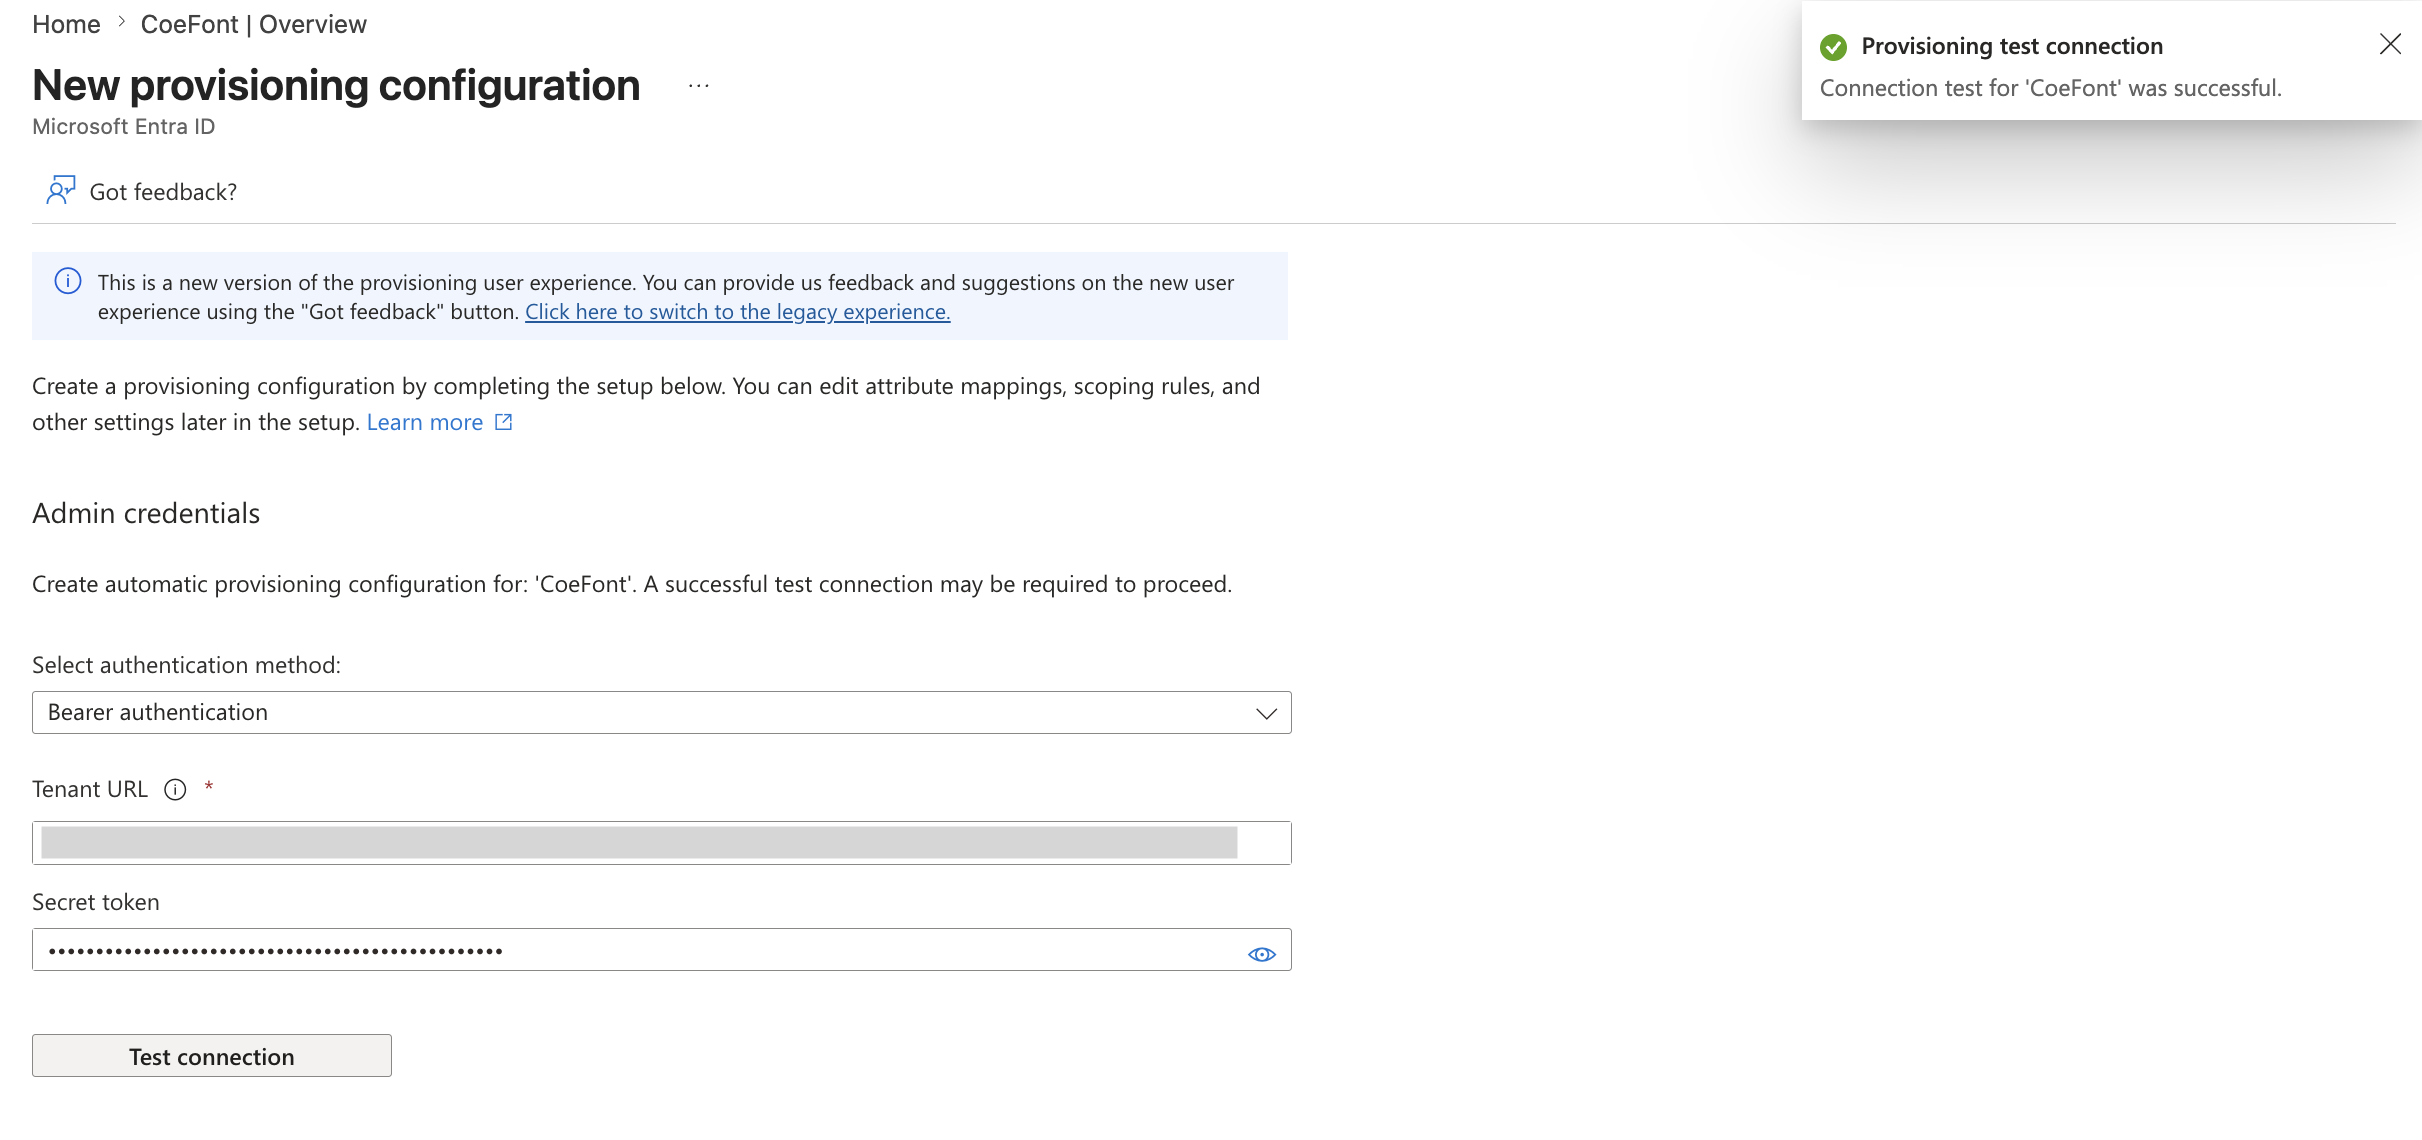
Once the test connection succeeds, click Create.
1-5. Start provisioning
Click Start provisioning from Provisioning to activate provisioning.
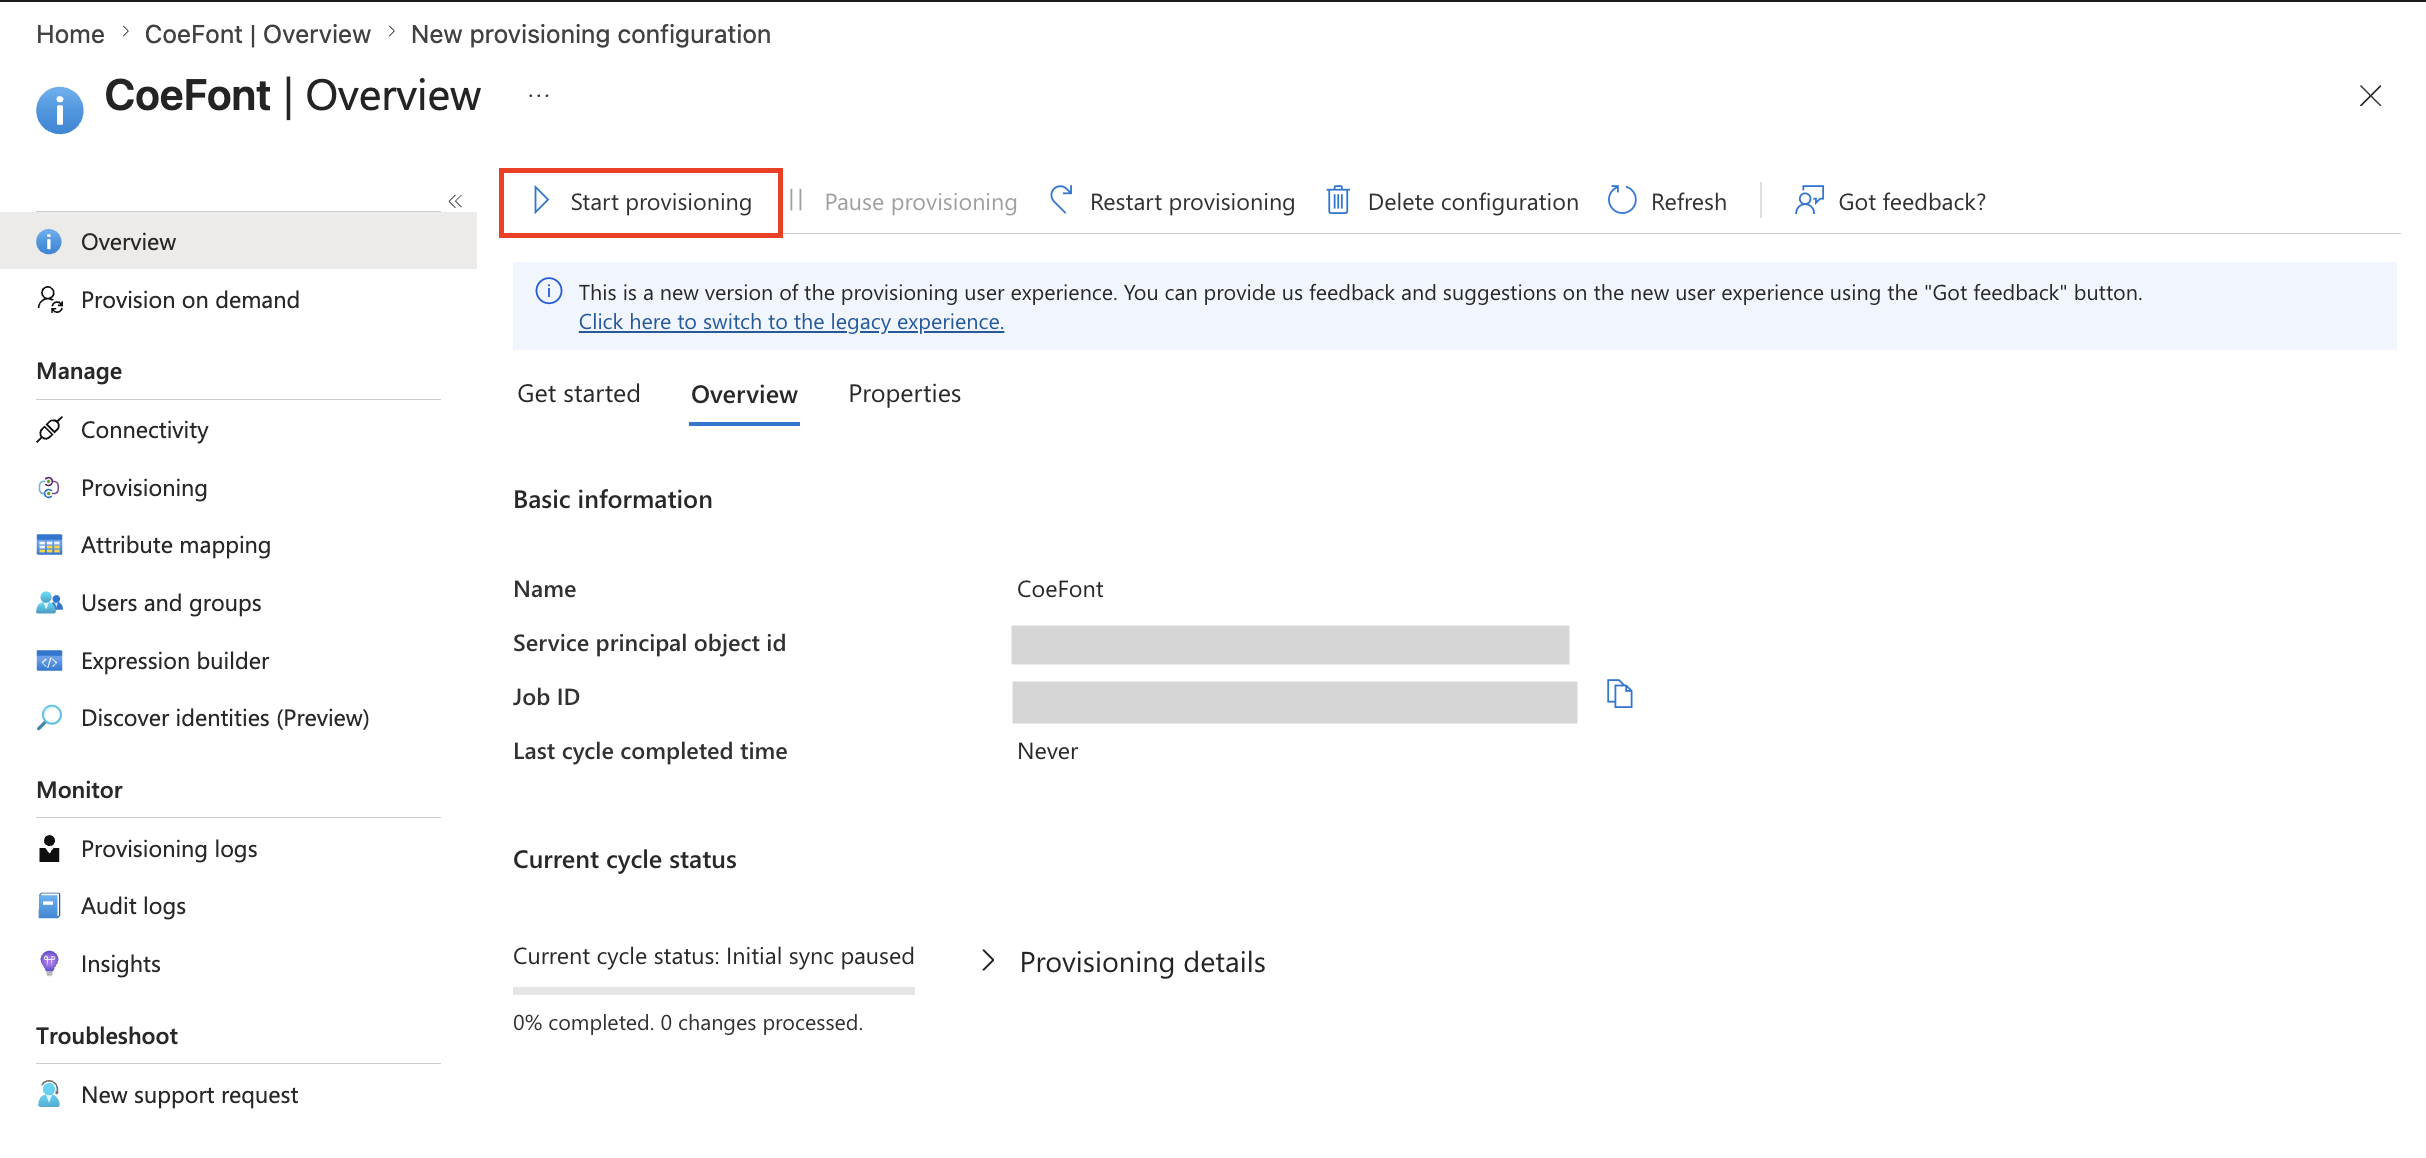
Provisioning setup is now complete.
1-6. Add users
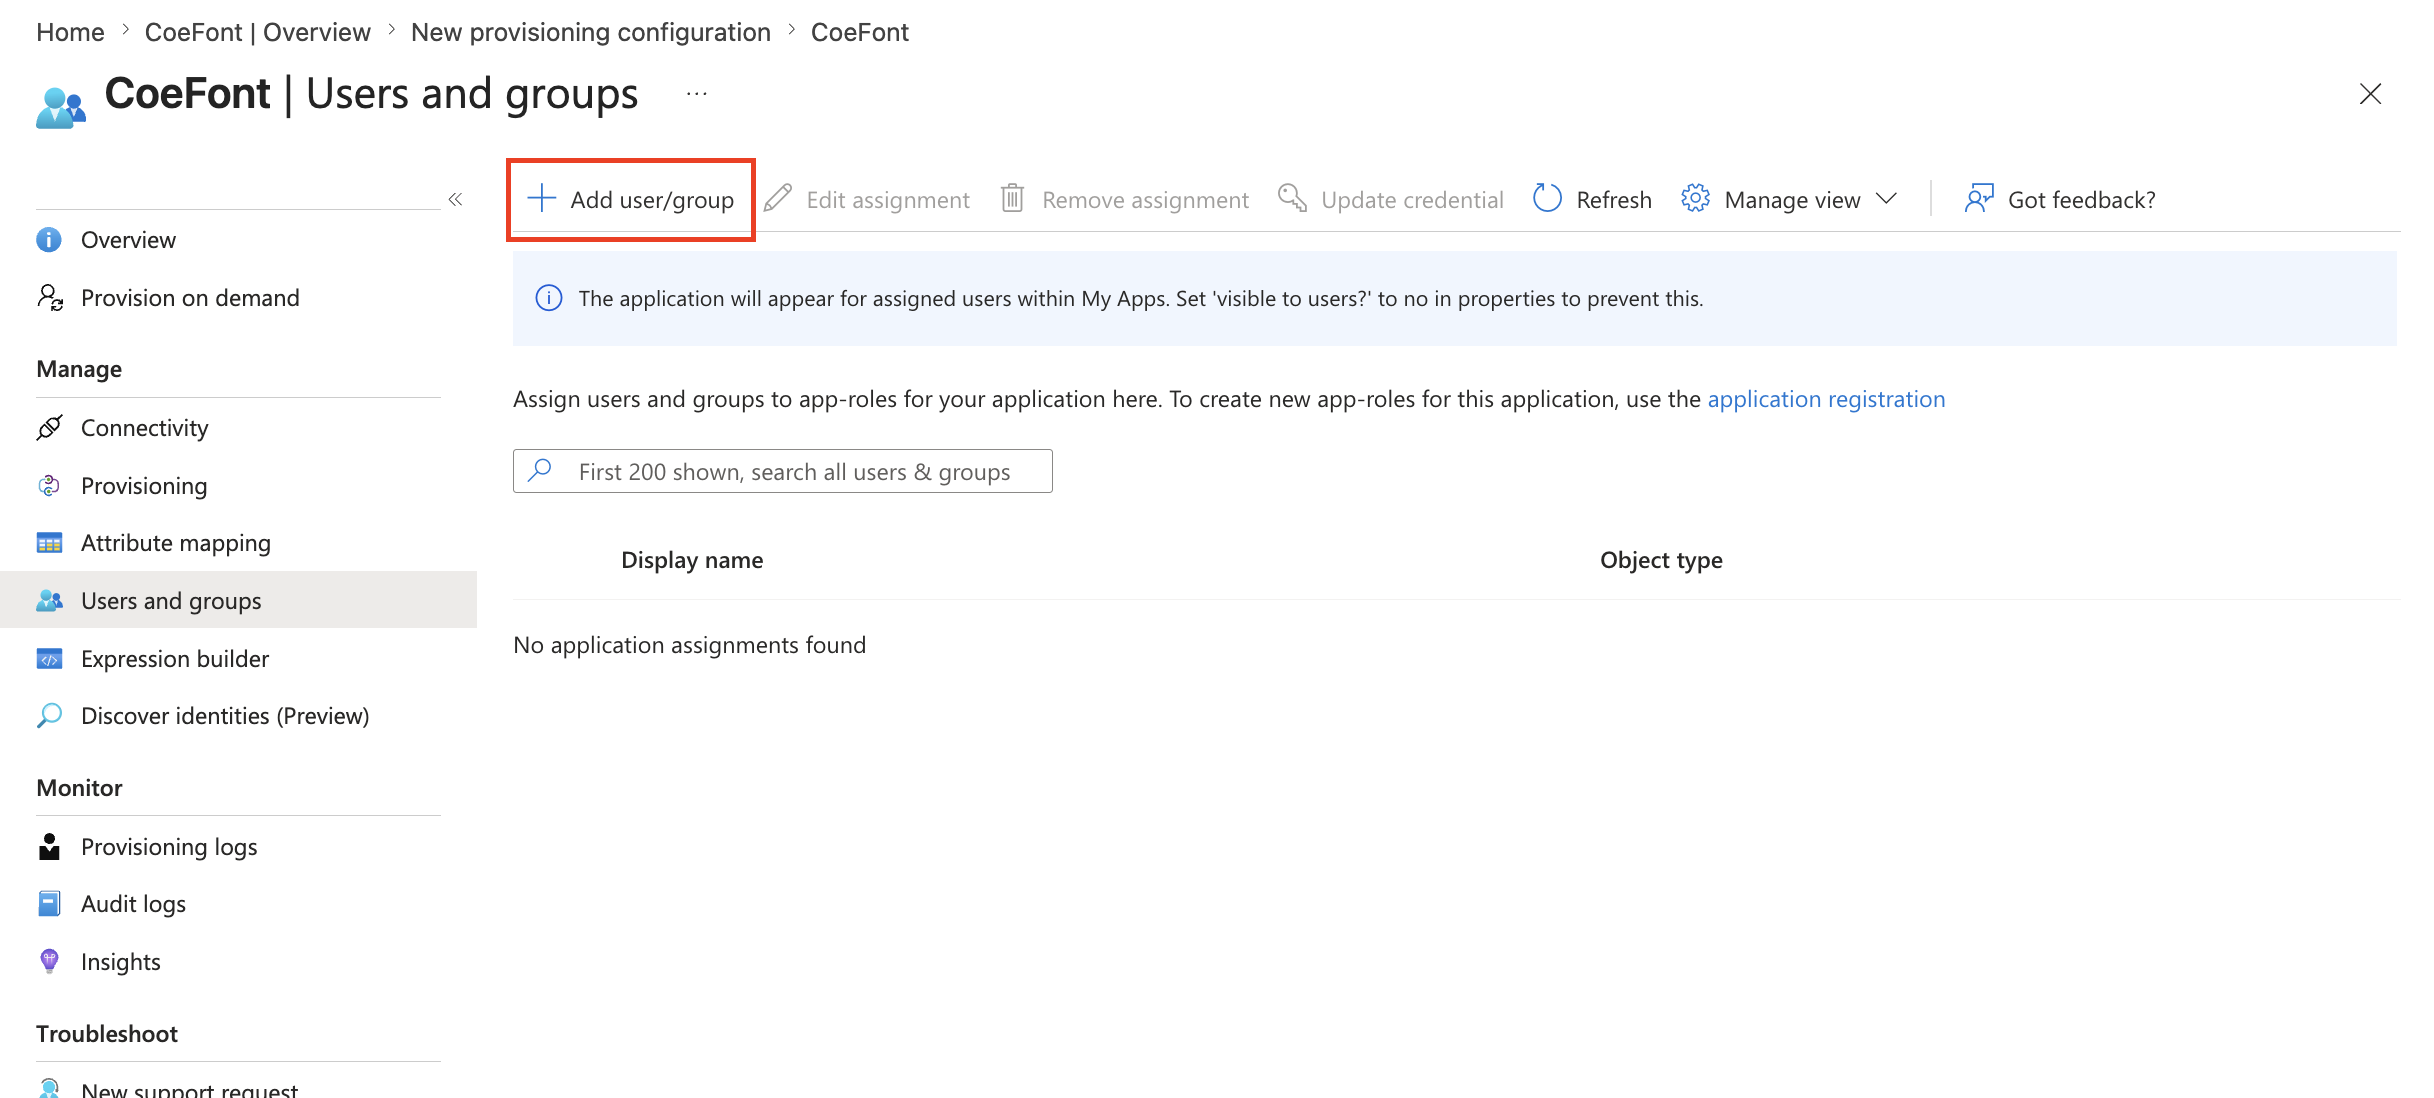
From Users and groups, click Add user/group to add users to the app.
1-7. Select users to add to the app
From Select users, choose the users you want to add to the app.
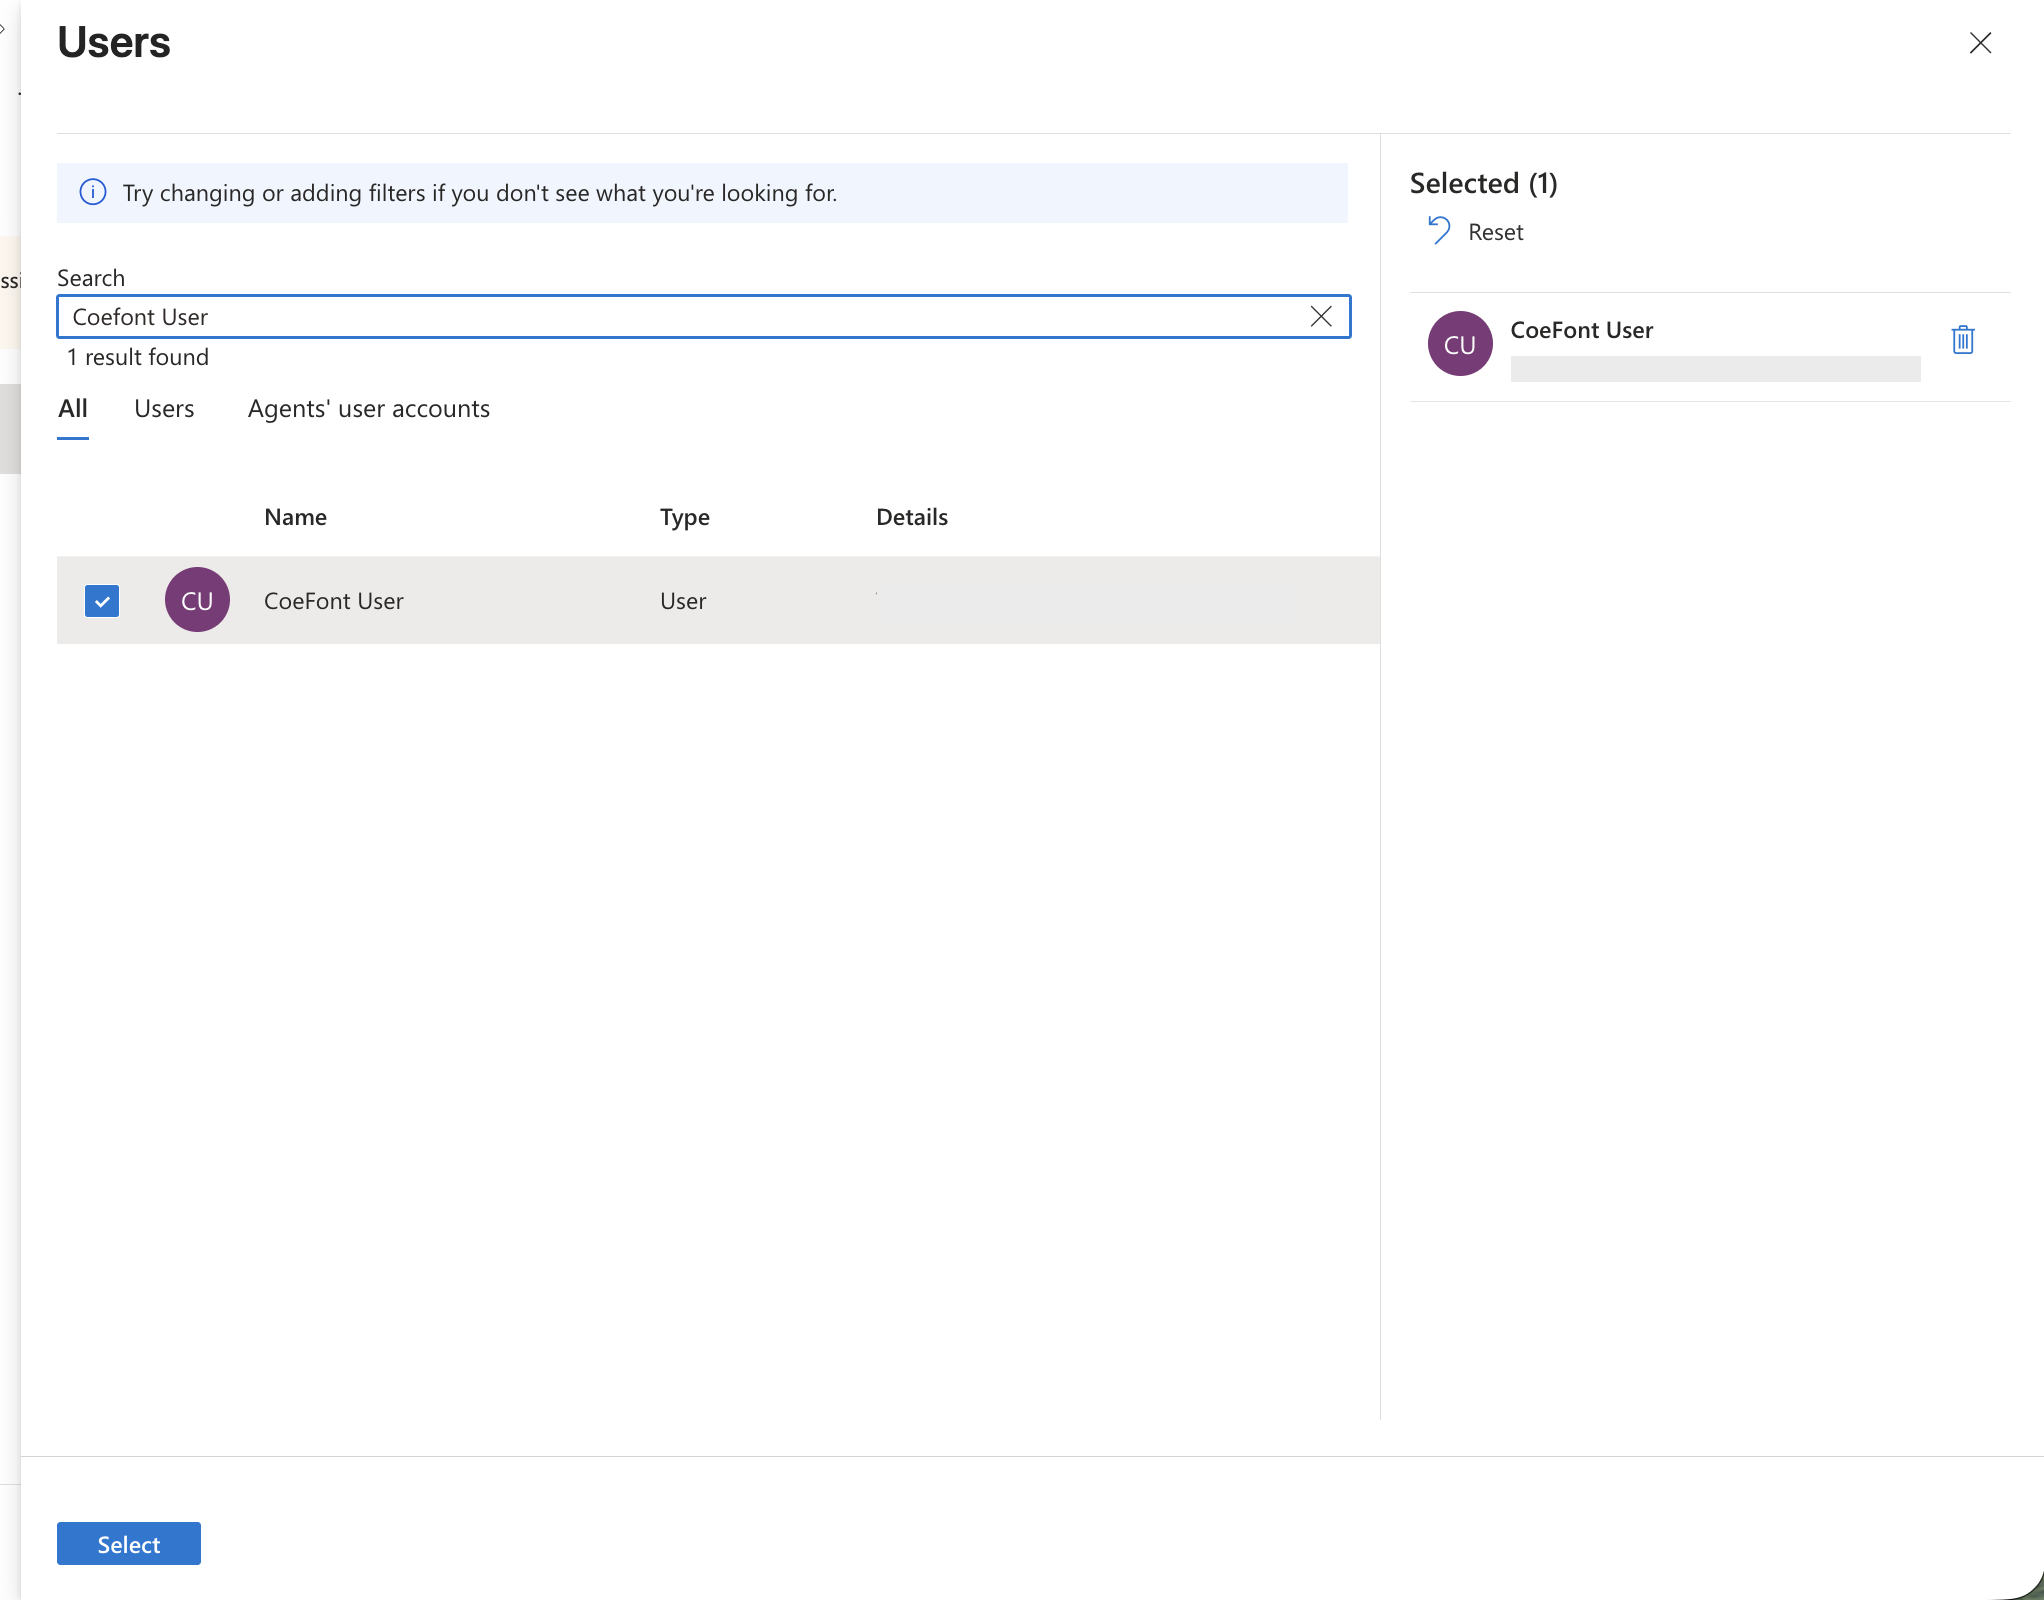
After selecting, click Assign to add the users to the app.
1-8. Verify that members have been added in CoeFont Interpreter
When provisioning succeeds, an invitation email is sent to the assigned members, and the members are also added in CoeFont Interpreter's member management screen. You can verify the addition from the member management screen.

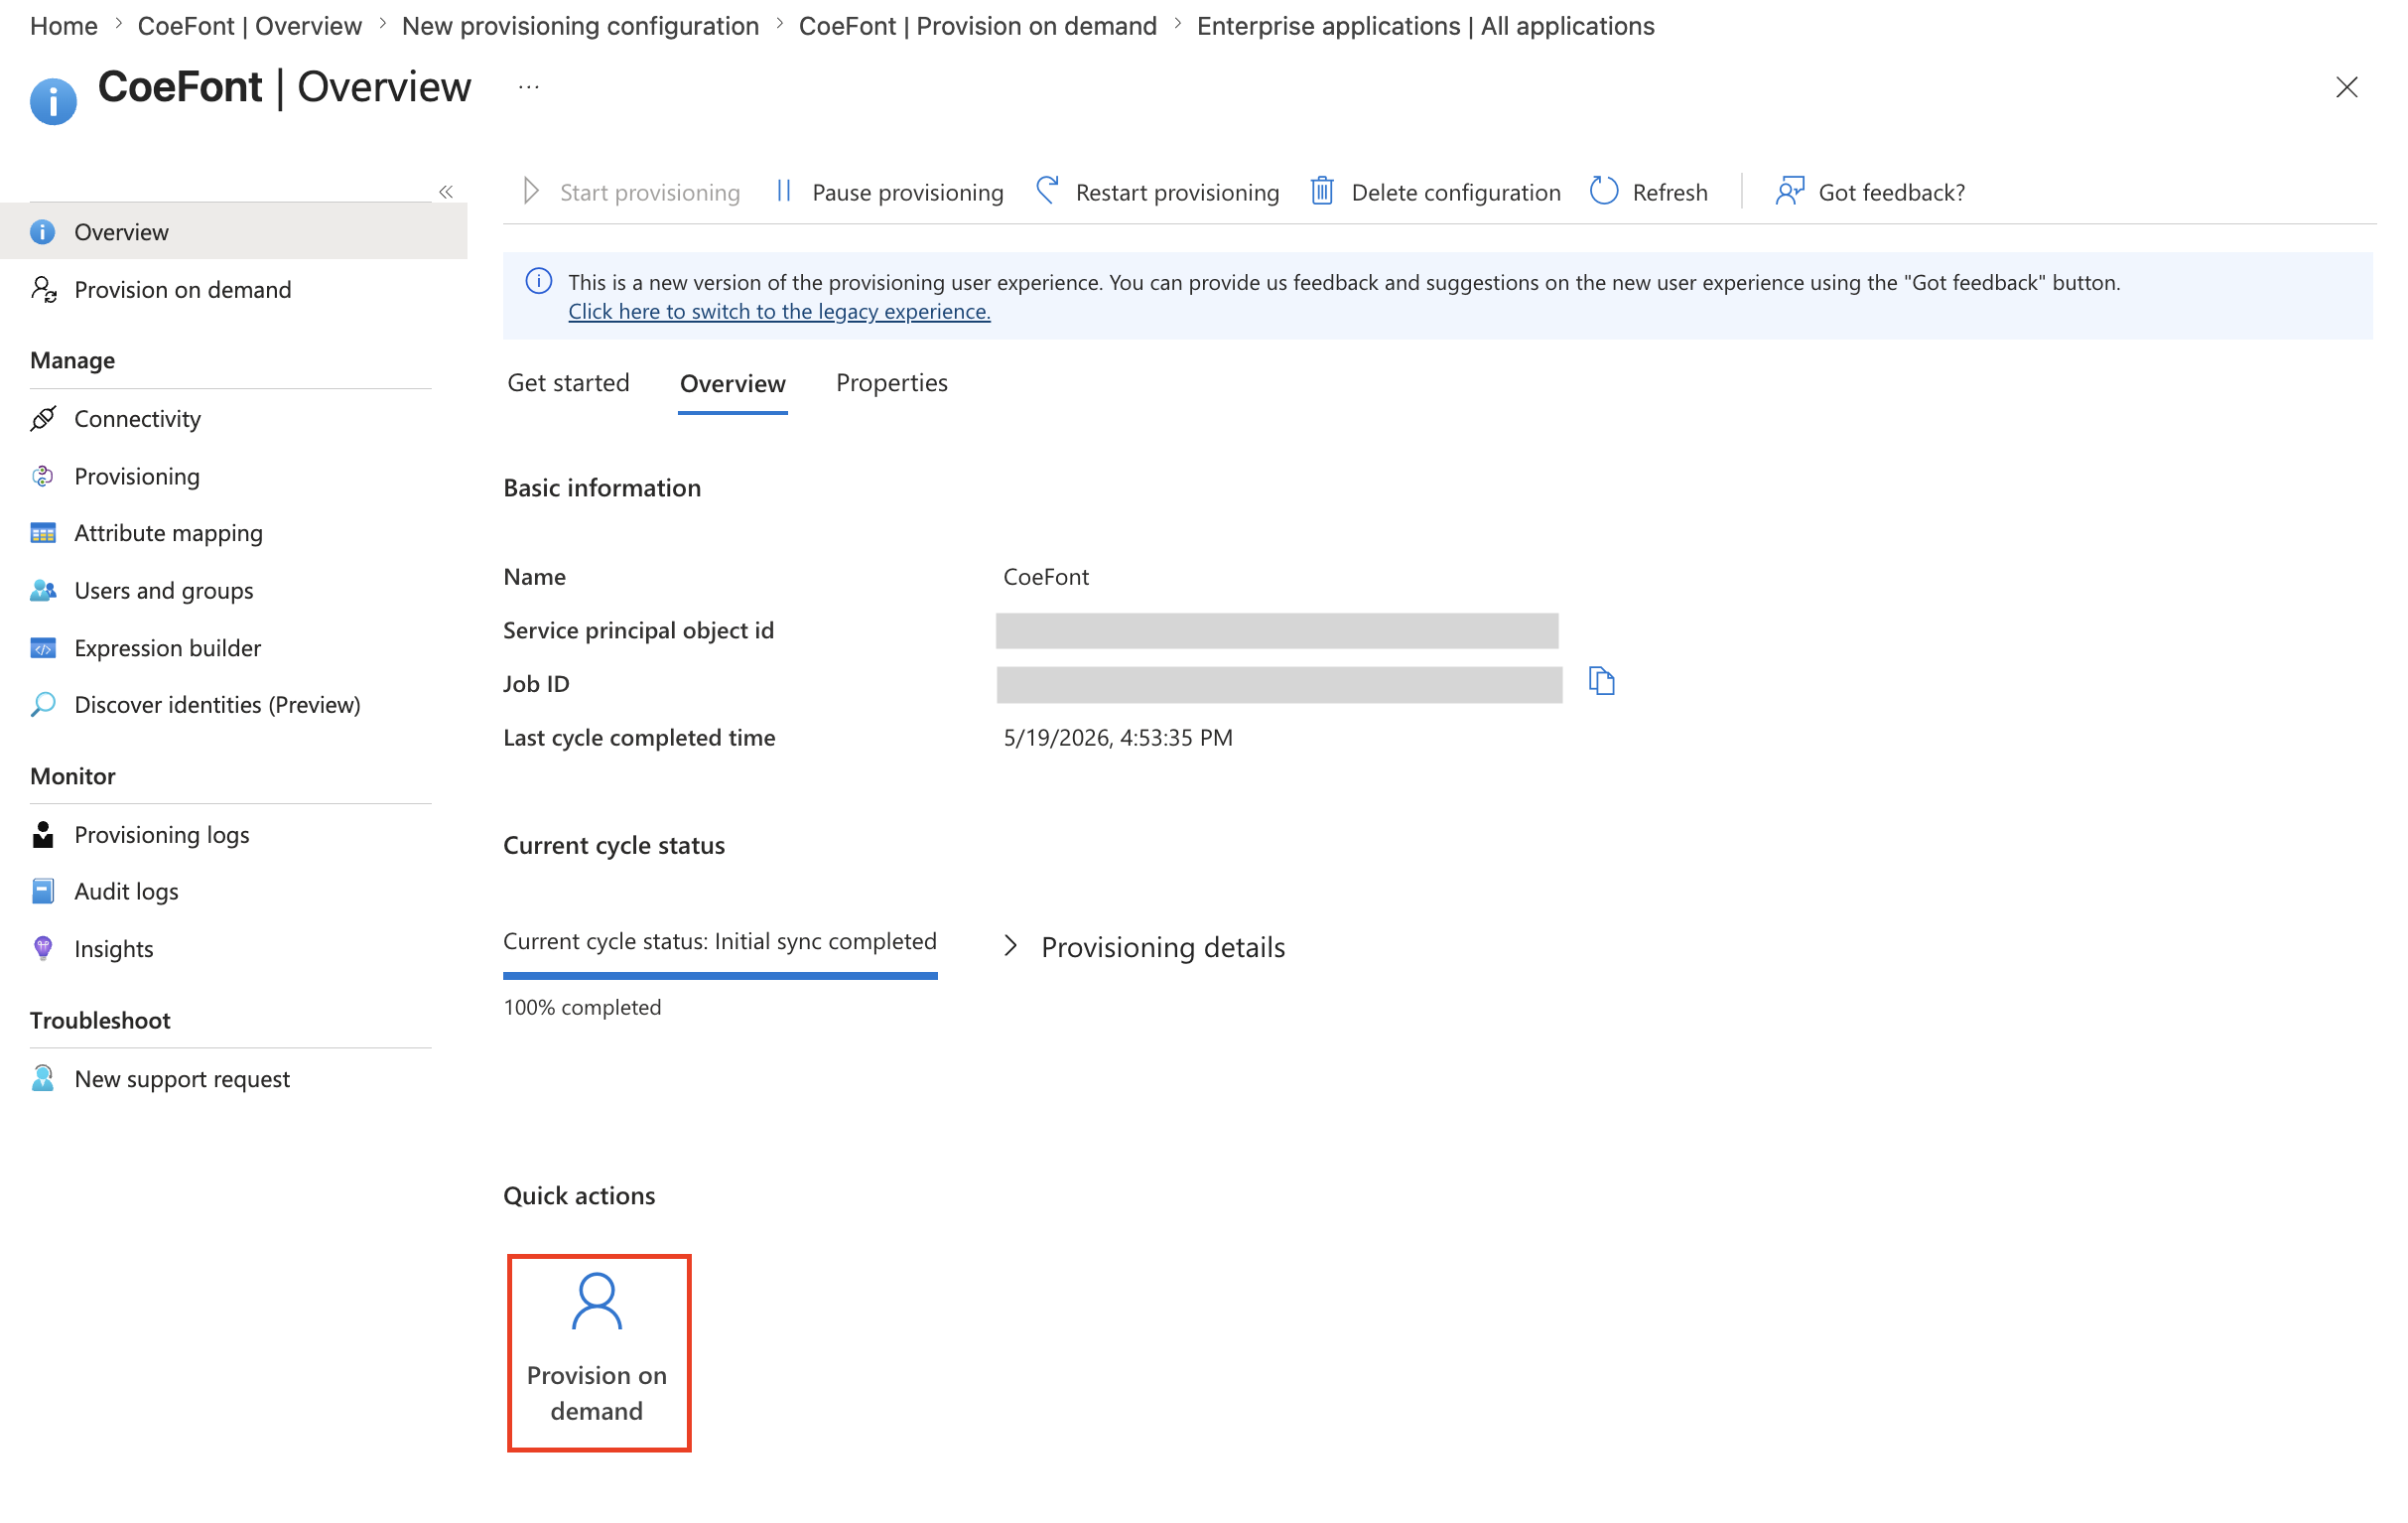
If the relevant user does not appear in the member management screen after a successful assignment, provisioning may not have run yet. Since provisioning runs on a schedule, members are typically added within a few minutes. If you need to check sooner, select Provision on demand from Provisioning.
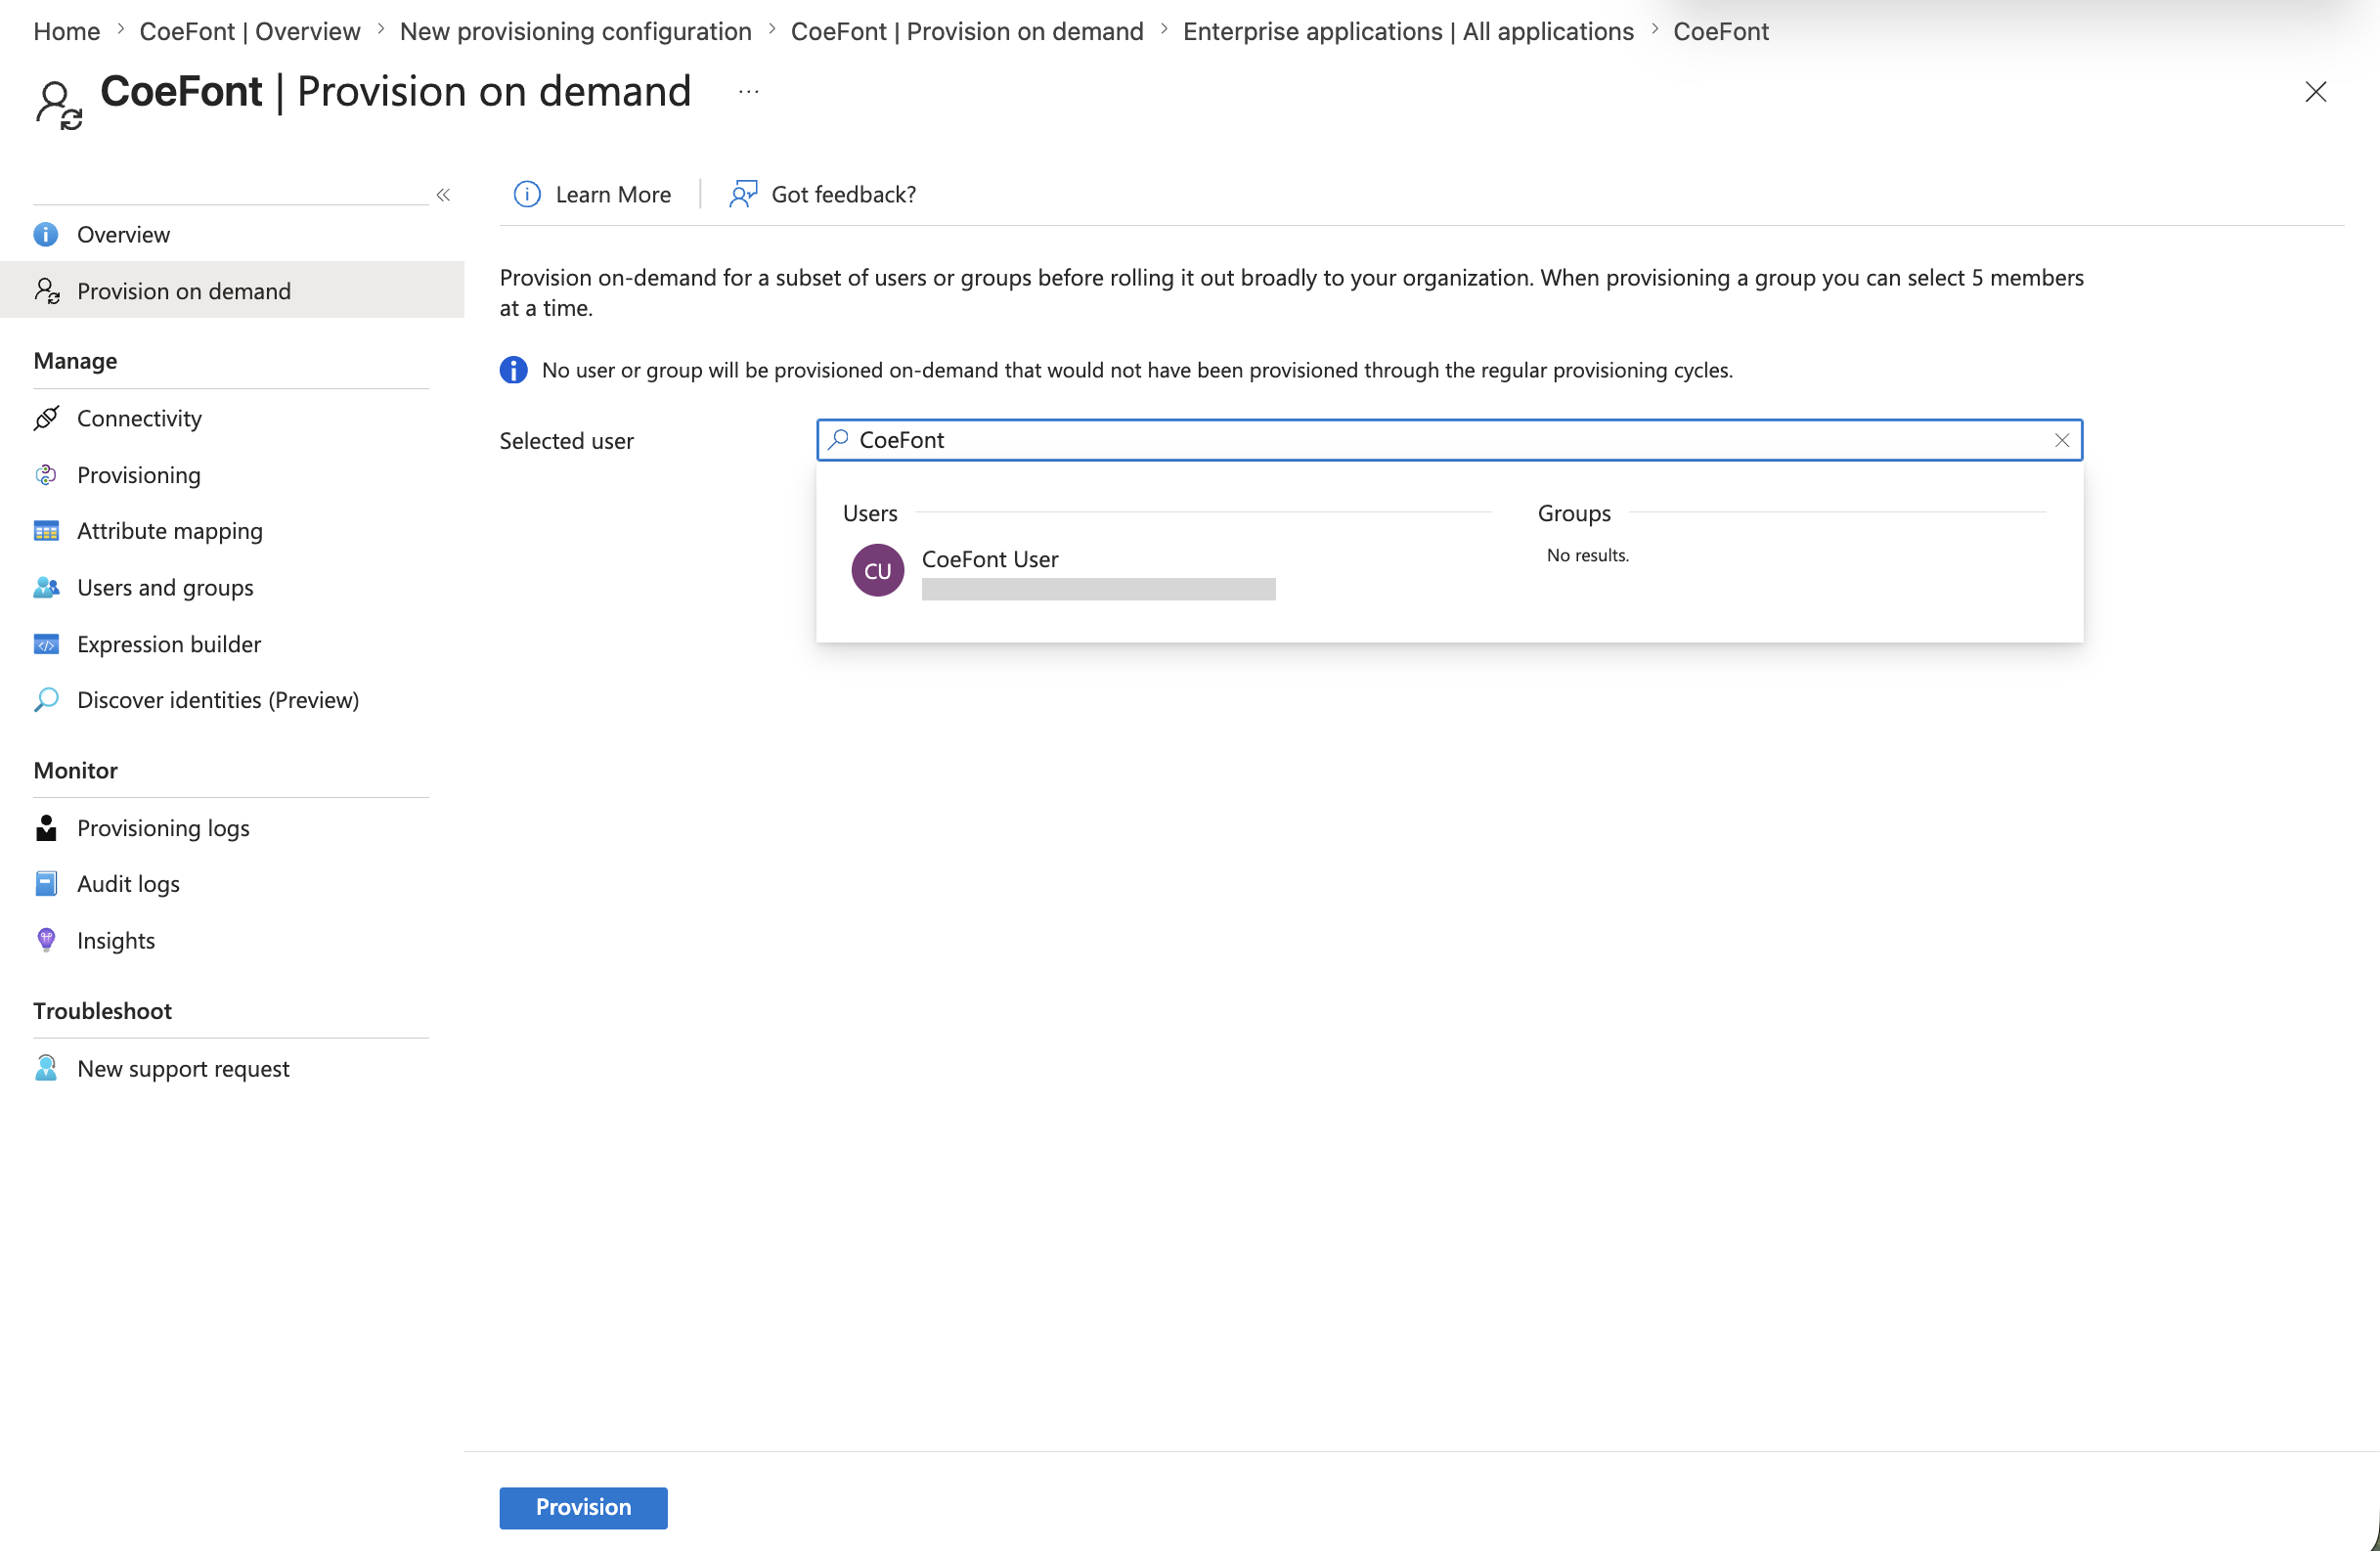
Search by the relevant username and click Provision.
When execution succeeds, the following screen is displayed.
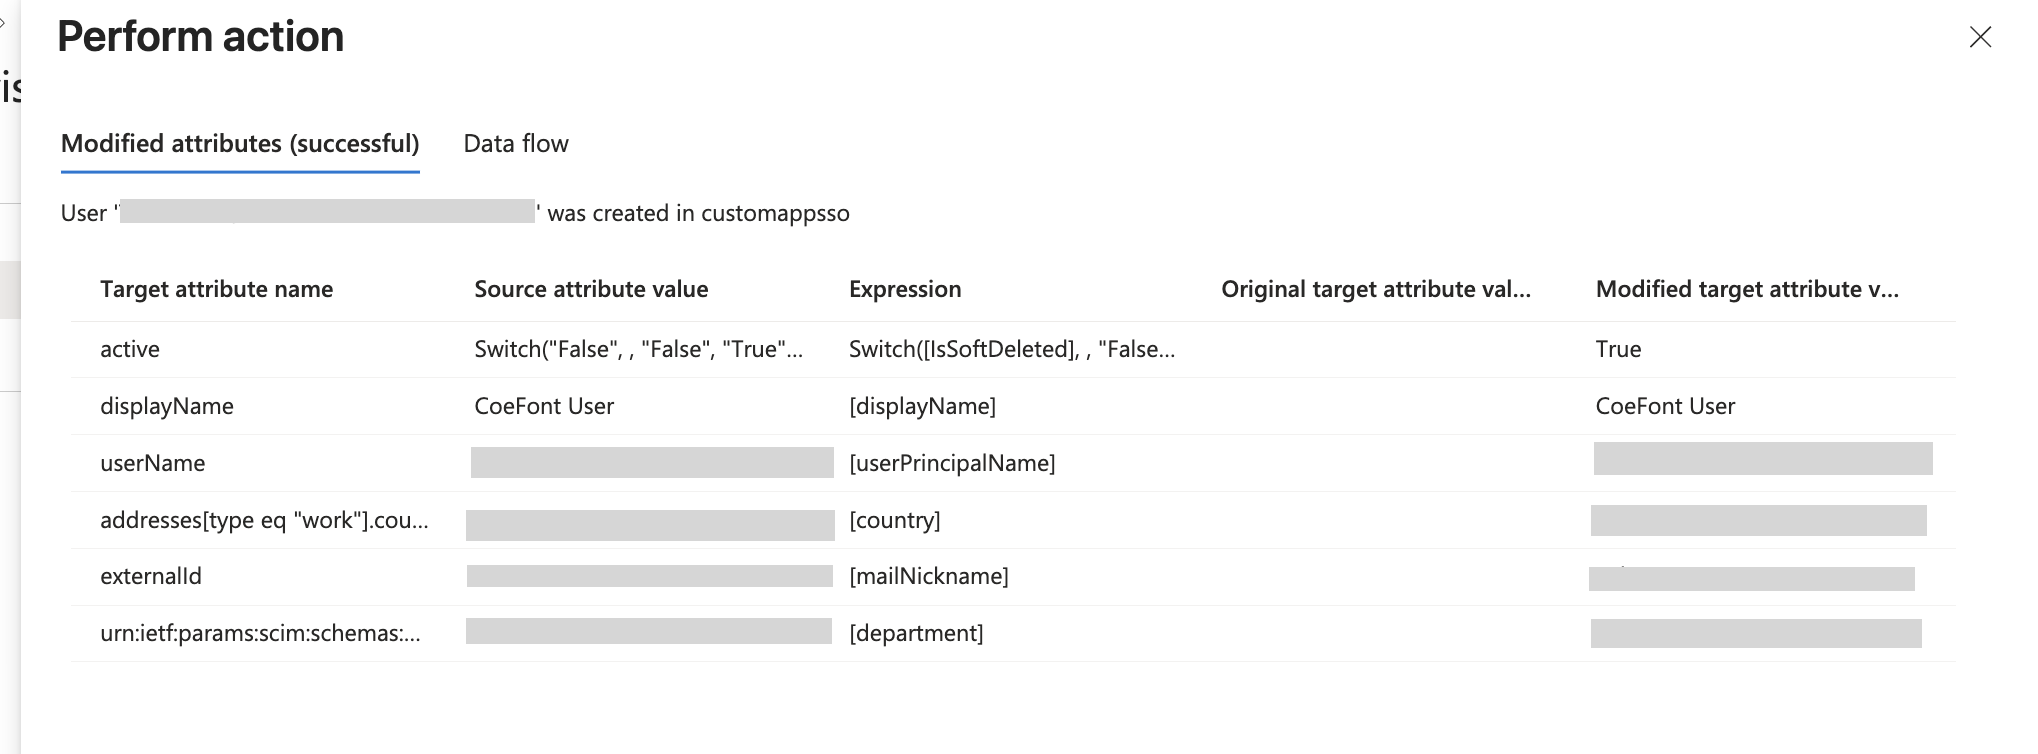
Upon success, an invitation email is sent to the assigned user and you can confirm they have been added from the member management screen.

1-9. Remove members
To remove a member, select the user from Users and groups and click Remove assignment.
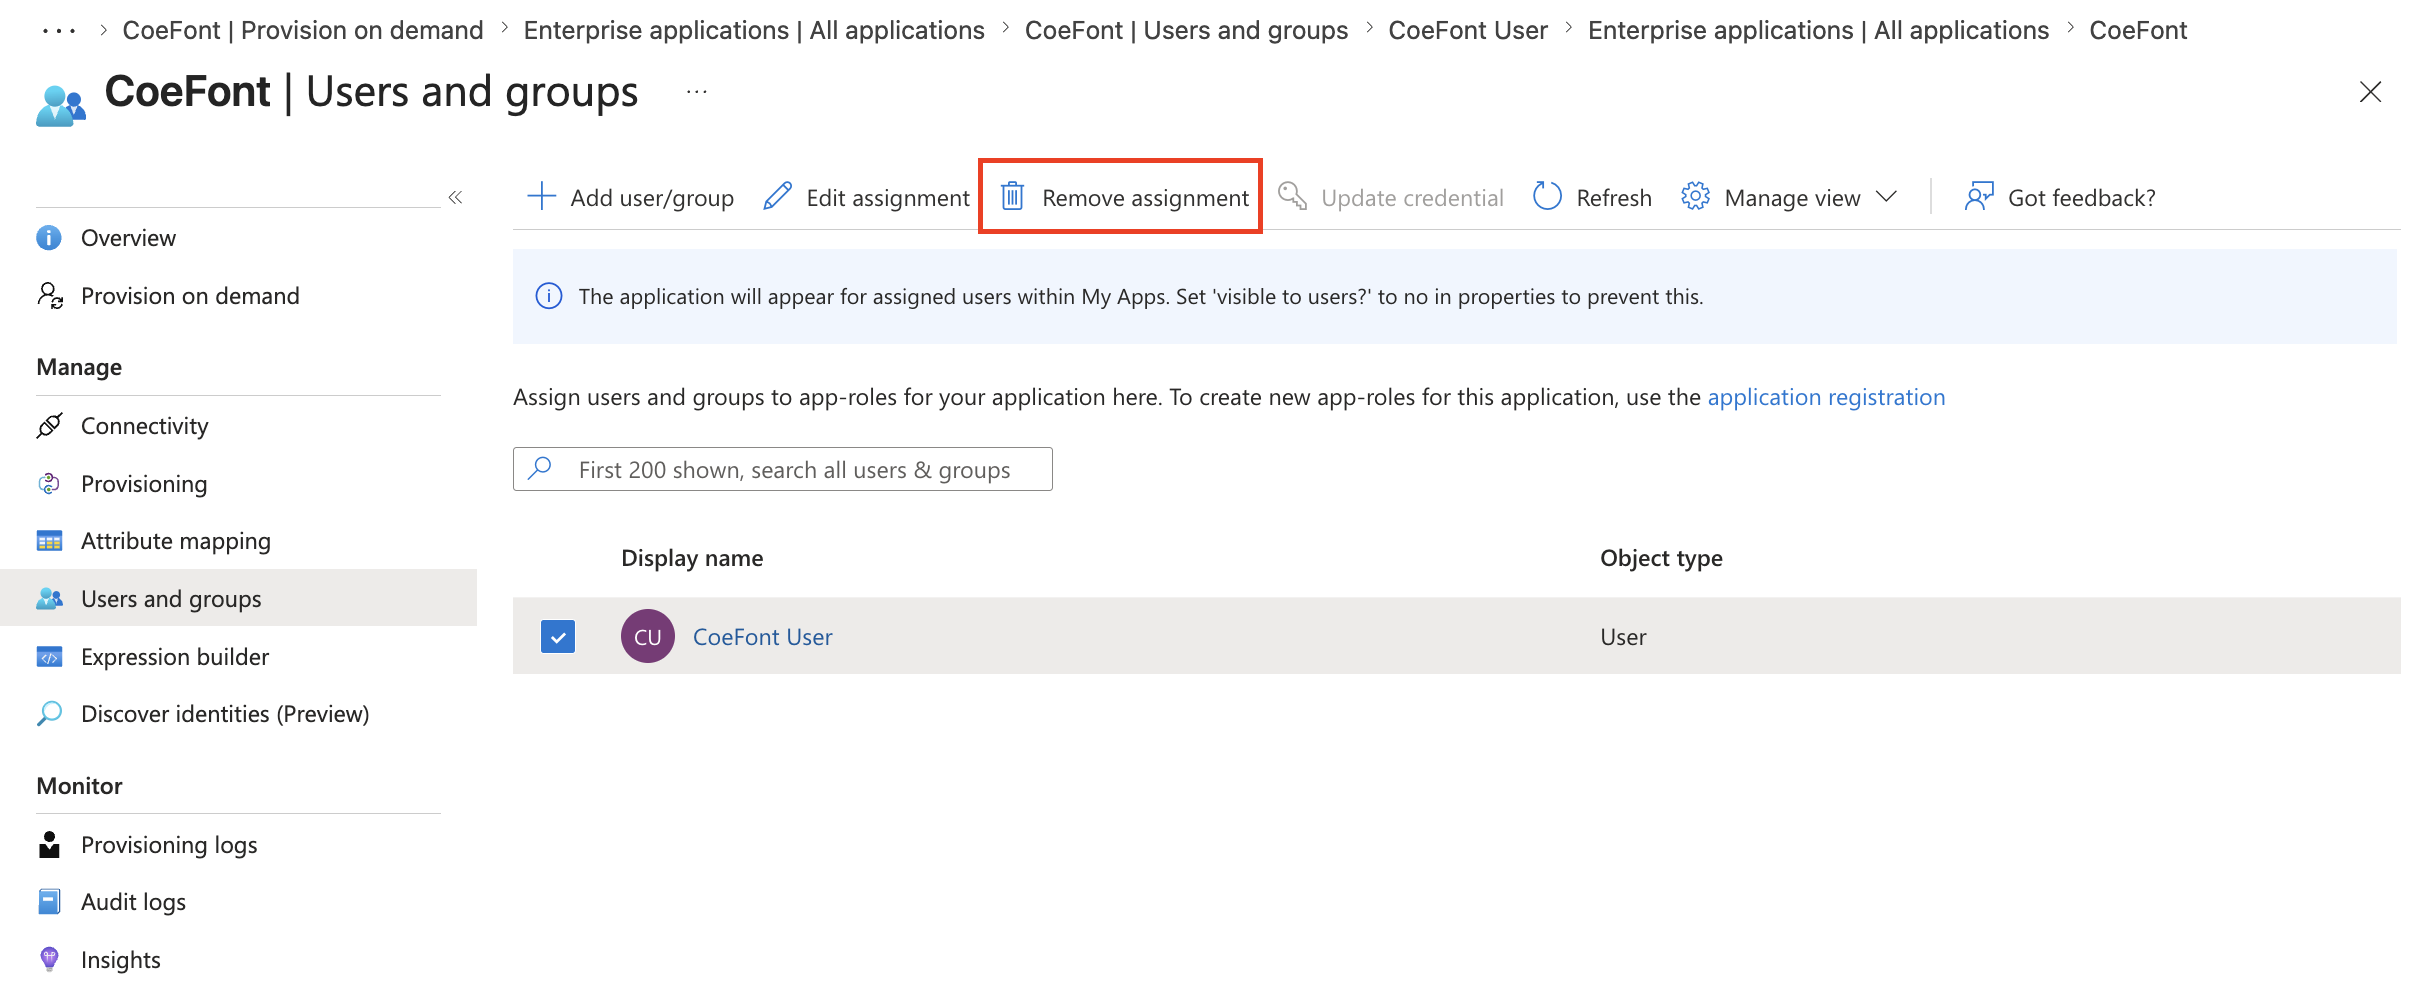
1-10. Verify that the member has been removed in CoeFont Interpreter
After removing the assignment, the relevant user is deleted from CoeFont Interpreter's member management screen.

1-11. Add or update member departments
The value of the Department field in Microsoft Entra ID is reflected into CoeFont Interpreter Departments when Department Sync with Your IdP is enabled. If you want to add or update departments while using provisioning, update the Department field in Entra ID.
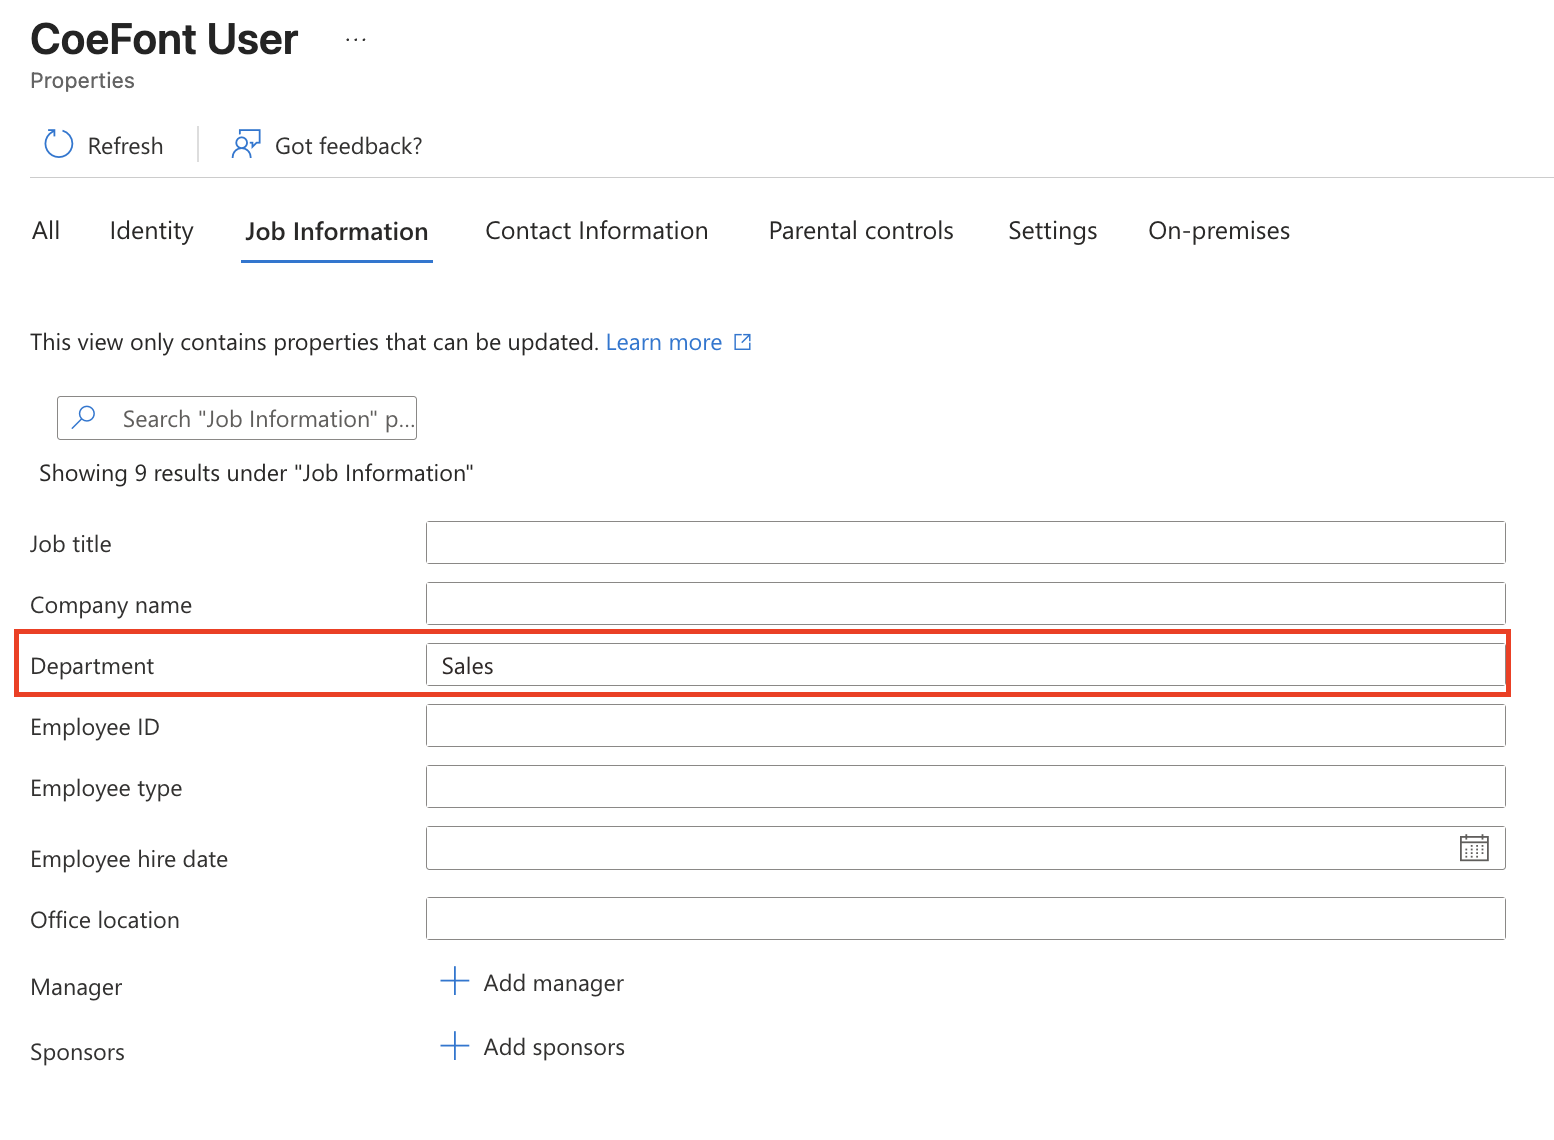
While Sync departments with your IdP is disabled, setting Department in Entra ID has no effect in CoeFont Interpreter. To manage departments from your IdP, enable Department Sync with Your IdP first.